Working with Particle Wallet within React Native applications
Particle Wallet for React Native
Particle Wallet is a central wallet interface facilitating interaction with both social logins (via Particle Auth) and external Web3 wallets. Particle Wallet works closely with Particle Connect to provide a standard UI for the utilization of associated/connected accounts. Particle Wallet is built to be relatively application-specific through significant customization potential and built-in modularization.
Configuration and utilization processes are detailed below.
Repository
Before jumping in, it may be worth looking at the Particle Wallet React Native GitHub repository to contextualize the SDK with a preliminary understanding of the underlying architecture and implementation flow by viewing the source code alongside included demos.
Getting Started
The setup process for the Particle Wallet React Native SDK is quite similar to the Particle Auth and Particle Connect setup process, although it deviates slightly.
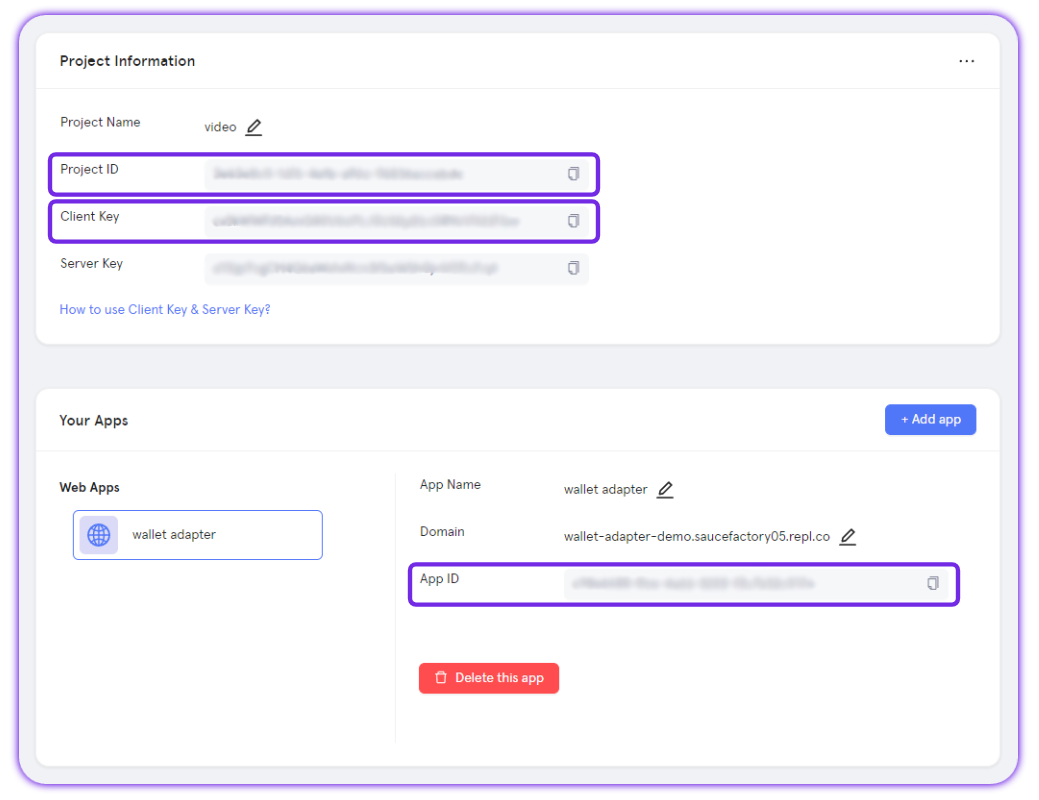
Before diving into platform-specific configuration, all Particle Wallet (& Connect/Auth) SDKs require three standard values for initialization: projectId, clientKey, and appId, all of which can be retrieved from the Particle dashboard.
- Sign up/log in to the Particle dashboard.
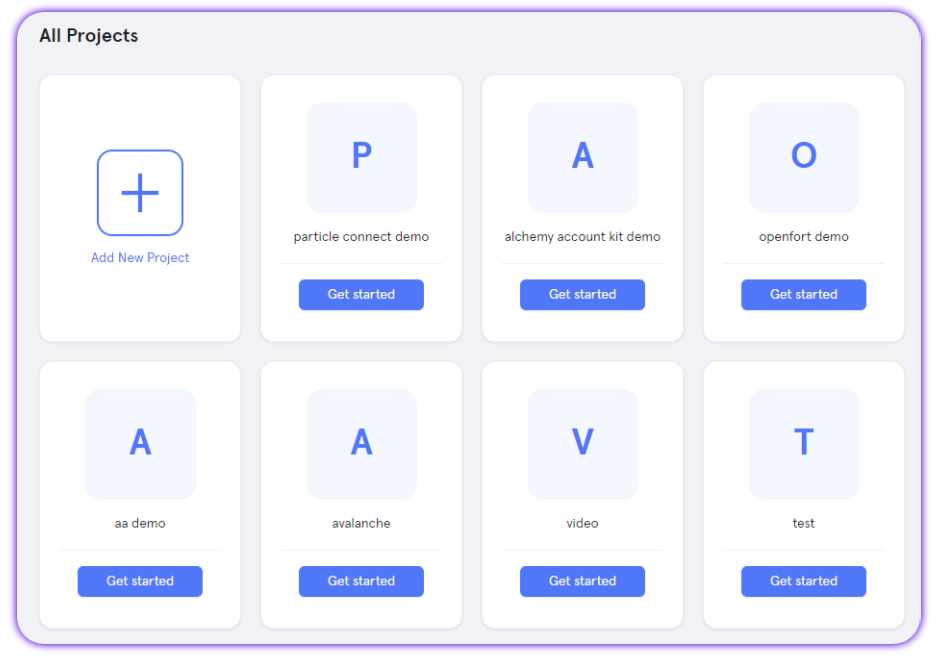
- Create a new project or enter an existing one.
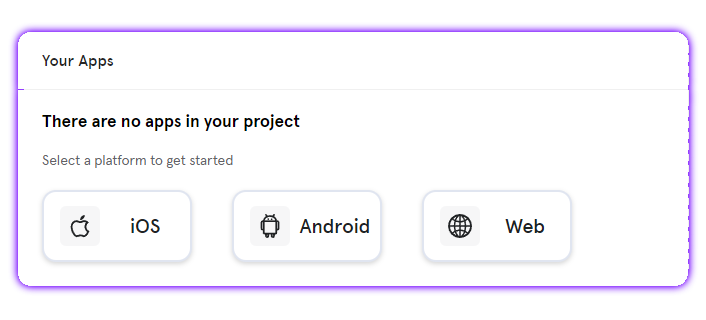
- Create a new application, or skip this step if you already have one.
- Retrieve the project ID (
projectId), the client key (clientKey), and the application ID (appId).
Adding the Particle Wallet React Native SDK to your application
Another constant in the setup process is the installation of @particle-network/rn-wallet, either through npm or Yarn, depending on your preference.
npm install @particle-network/rn-wallet

// Or

yarn add @particle-network/rn-wallet
Android configuration
If you're planning on using Android for your React Native application, ensure you're meeting the following prerequisites (otherwise, expect issues or non-functionality):
- Targets API Level 23 (Marshmallow) or higher.
- Uses Android 6.0 or higher.
- Uses Jetpack (Android X).
- Uses Java 11.
Once you've made sure your project meets these requirements, you'll need to move on and define the aforementioned configuration values (projectId, clientKey, and appId) within your build.grade file (generally found at ${project name}/android/app/build.gradle). These directly link your application's instance of Particle Connect with the dashboard.
Specifically, within build.gradle, you'll need to set four different values:
dataBinding, this should be enabled withenabled = true.manifestPlaceholders["PN_PROJECT_ID"], theprojectIdpreviously retrieved from the Particle dashboard.manifestPlaceholders["PN_PROJECT_CLIENT_KEY"], theclientKeypreviously retrieved from the Particle dashboard.manifestPlaceholders["PN_APP_ID"], theappIdpreviously retrieved from the Particle dashboard.
android {
  ...
  defaultConfig {
      ......
      manifestPlaceholders["PN_PROJECT_ID"] = "your project id"
      manifestPlaceholders["PN_PROJECT_CLIENT_KEY"] = "your project client key"
      manifestPlaceholders["PN_APP_ID"] = "your app id"
  }

  dataBinding {
      enabled = true
  }

}
iOS configuration
To use iOS for your React Native application, you'll need to ensure that your project meets the following requirements:
-
Xcode 15.0 or later.
-
iOS 14 or later.
With these requirements set, you'll need to open an exported iOS project and find ios/{project name}.xcworkspace.
At the root of your Xcode project, create a new file, ParticleNetwork-Info.plist. Ensure this is marked under "Target Membership."
From here, with a fresh ParticleNetwork-Info.plist file, go ahead and fill it in with the following:
<?xml version="1.0" encoding="UTF-8"?>
<!DOCTYPE plist PUBLIC "-//Apple//DTD PLIST 1.0//EN" "http://www.apple.com/DTDs/PropertyList-1.0.dtd">
<plist version="1.0">
<dict>
	<key>PROJECT_UUID</key>
	<string>YOUR_PROJECT_UUID</string>
	<key>PROJECT_CLIENT_KEY</key>
	<string>YOUR_PROJECT_CLIENT_KEY</string>
	<key>PROJECT_APP_UUID</key>
	<string>YOUR_PROJECT_APP_UUID</string>
</dict>
</plist>
Similar to the Android configuration, you'll need to fill in PROJECT_UUID (projectId), PROJECT_CLIENT_KEY (clientKey), and PROJECT_APP_UUID (appId) with the corresponding values retrieved from the Particle dashboard.
Next, you'll need to head over to your AppDelegate.swift file to add an import of react_native_particle_connect, which Particle Wallet depends on in a large capacity.
#import <react_native_particle_connect/react_native_particle_connect-Swift.h>
Additionally, within your application's application method (as shown below), you'll need to include a handler condition derived from ParticleConnectSchemeManager handleUrl:url. This should be as simple as a YES (true) return upon a truthy value of ParticleConnectSchemeManager handleUrl:url.
- (BOOL)application:(UIApplication *)application openURL:(NSURL *)url options:(NSDictionary<UIApplicationOpenURLOptionsKey,id> *)options {
  if ([ParticleConnectSchemeManager handleUrl:url] == YES) {
    return YES;
  } else {
    // other methods
  }
  return YES;
}
Wrapping up, you'll need to configure your application's scheme URL. To configure this, select your application from "TARGETS" under the "Info" section, then click "+" to add a URL type.
This should simply be set to "pn" + your projectId (retrieved and configured prior), resulting in a scheme URL that looks something like the following:
pn63bfa427-cf5f-4742-9ff1-e8f5a1b9828f
Additionally, head over to your Info.plist file and include the following snippet.
<key>LSApplicationQueriesSchemes</key>
<array>
    <string>imtokenv2</string>
    <string>metamask</string>
    <string>phantom</string>
    <string>bitkeep</string>
    <string>trust</string>
    <string>rainbow</string>
    <string>zerion</string>
    <string>mathwallet</string>
    <string>1inch</string>
    <string>awallet</string>
    <string>okex</string>
</array>
Finally, you'll need to edit your Podfile to ensure particle_connect (which, as mentioned, Particle Wallet depends on) is properly imported. Head over to the linked guide to complete this if you have not already.
Examples of Utilization
Initialization
The Particle Wallet SDK won't function until initialization occurs. This will set several key parameters used and required by the wallet interface. Specifically, this is done through particleWallet.initWallet, which takes one parameter, walletMetaData. This should a DappMetaData object containing:
walletConnectProjectId, your WalletConnect project ID retrieved from the WalletConnect dashboard.name, the name of your project.icon, your project's logo - ideally 512x512.url, the URL of your project's website.description, a brief description of your project.- Optionally,
redirectandverifyUrl.
If you're also using Particle Connect within the same file, you can call init, passing in chainInfo and env. For more information on Particle Connect, see the Particle Connect React Native SDK.
import * as particleWallet from '@particle-network/rn-wallet';
import * as particleConnect from '@particle-network/rn-connect';
import * as ParticleAuthCore from '@particle-network/rn-auth-core';

const chainInfo = PolygonAmoy;
const env = Env.Dev;
const metaData = {
  walletConnectProjectId: 'your wallet connect project id, get it from wallet connect',
  name: 'Particle Connect',
  icon: 'https://connect.particle.network/icons/512.png',
  url: 'https://connect.particle.network',
  description: 'Particle Wallet',
};
particleConnect.init(chainInfo, env, metaData);
ParticleAuthCore.init();
particleWallet.initWallet(metaData);
Open Wallet
To open the main (front) page of the wallet interface, you can call particleWallet.navigatorWallet. This only takes one parameter, display, which should be a binary choice, (0, or 1), that dictates whether the front page includes general token balances (0), or NFT balances (1). E.g.:
particleWallet.navigatorWallet(display);
Open Token Receive
particleWallet.navigatorTokenReceive opens a page dedicated to receiving tokens, through both a general address and a QR code. This takes one optional parameter, tokenAddress, that can change the associated QR code to be specific to a given token, including its icon at the center of the QR code image. E.g.
particleWallet.navigatorTokenReceive(tokenAddress);
Open Token Send
You can also open a page for sending tokens (ERC20/SPL/native) directly to other addresses. This can be done through particleWallet.navigatorTokenSend, optionally passing in the following parameters to predefine (fill in) specific values within the page:
tokenAddress, the contract address of the token to be sent, can be set tonativefor the default/native network token.toAddress, the recipient's address.amount, the volume oftokenAddressthat'll be sent totoAddress.
E.g.
particleWallet.navigatorTokenSend(tokenAddress, toAddress, amount);
Open Transaction Records
It's also quite simple to open a page containing transaction records (history) for a connected wallet: particleWallet.navigatorTokenTransactionRecords. If you'd like to filter these records only to show entries that include a specific token, then you can pass in a tokenAddress representing the token to be filtered. E.g.
particleWallet.navigatorTokenTransactionRecords(tokenAddress);
Open NFT Send
Alike navigatorTokenSend, you can use particleWallet.navigatorNFTSend to prompt a page for sending a specific NFT (defined by a mint/contractAddress and tokenId) to another address. navigatorNFTSend takes three parameters:
receiverAddress, the recipient's address.mint(also known ascontractAddress), the address of the NFT contract to be sent.tokenId, the token ID for the specific NFT associated withmint. This can be set asnullfor Solana.
E.g.
particleWallet.navigatorNFTSend(receiverAddress, mint, tokenId);
Open NFT Details
To open the details of a specific NFT (image, attributes, description, etc.) on-screen, you'll need to call particleWallet.navigatorNFTDetails by passing in mint (contractAddress) and the associated tokenId that you'd like to view. E.g.
particleWallet.navigatorNFTDetails(mint, tokenId);
Open Buy Crypto
Particle Wallet also has a native onramp aggregator (featuring providers like Transak, FatPay, AlchemyPay, etc.), allowing users to bring fiat on-chain through various onramp providers. Opening this programmatically can happen through particleWallet.navigatorBuyCrypto, passing in several optional parameters to customize the values used within the onramp. Upon calling, this will throw a popup or total redirect over to a corresponding configuration of https://ramp.particle.network.
The specific parameters that can be used within navigatorBuyCrypto are listed below:
| Name | Description | Type | Required |
|---|---|---|---|
| network | [Solana, Ethereum, Binance Smart Chain, Polygon, Tron, Optimism, etc.] | string | False (True if Particle not connected) |
| fiatCoin | Fiat currency denomination. | string | False |
| cryptoCoin | Cryptocurrency denomination. | string | False |
| fiatAmt | The amount of fiat to be automatically filled in as the purchase volume. | number | False |
| bool | Lock selection of fiat currency in the buy menu. | bool | False |
| fixCryptoCoin | Lock selection of cryptocurrency in the buy menu. | bool | False |
| fixFiatAmt | Lock selection of fiat amount in the buy menu. | bool | False |
| walletAddress | The wallet address to receive the cryptocurrency. | string | False (True if Particle not connected) |
particleWallet.navigatorBuyCrypto();

const config = new BuyCryptoConfig("0xa0869E99886e1b6737A4364F2cf9Bb454FD637E4", "BNB", "USD", 1000, OpenBuyNetwork.BinanceSmartChain);
particleWallet.navigatorBuyCrypto(config);
Open Swap
Particle Wallet features a built-in swap widget, aggregating multiple providers such as 1inch to initiate and execute swaps. This widget/interface can be thrown by using particleWallet.navigatorSwap, and optionally passing in the following parameters (can work without them):
fromTokenAddress, the contract address for the token being swapped.toTokenAddress, the contract address for the token being swapped to.amount, the volume offromTokenAddressto be swapped.
E.g.
particleWallet.navigatorSwap(fromTokenAddress, toTokenAddress, amount);
Set Supported Chains
Narrowing the specific chains supported/accessible within the Particle Wallet interface can be done through particleWallet.setSupportChain, which takes an array of ChainInfo objects (imported from @particle-network/chains). Network options will be confined to the corresponding chains within this array. E.g.
const chainInfos = [Ethereum, Polygon];
particleWallet.setSupportChain(chainInfos);
Switch Wallet
You can also switch the walletType being used within Particle Wallet. For example, if you're using Metamask as a wallet type within Particle Wallet and would like to switch to Particle (social logins), this would be the method you'd use. You can initiate this switch through particleWallet.switchWallet, passing in the new walletType object (of type WalletType), and the targeted user address of the current active session. E.g.
WalletType walletType = WalletType.particle;
String result = await particleWallet.switchWallet(walletType, publicAddress);
Custom UI
Particle Wallet can also undergo additional customization, specifically regarding which UI elements are shown and how. Each of these configurations are accessed through a unique method on particleWallet (@particle-network/rn-wallet). These methods include (but are not limited to):
-
setDisplayTokenAddresses, an asynchronous function to set specific token addresses to be displayed in the Particle Wallet. It takes an array of token addresses as a parameter,tokenAddresses. -
setDisplayNFTContractAddresses, an asynchronous function for setting specific NFT contract addresses to be displayed in the Particle Wallet. This function accepts an array of NFT contract addresses,nftContractAddresses. -
setPriorityTokenAddresses, an async function that prioritizes certain token addresses to appear at the top of lists within the Particle Wallet. It requires an array of token addresses,tokenAddresses. -
setPriorityNFTContractAddresses, an asynchronous function to prioritize specific NFT contract addresses in the Particle Wallet, making them appear at the top of lists. It takes an array of NFT contract addresses,nftContractAddresses. -
setShowLanguageSetting, an async function to toggle the visibility of the language setting option in the Particle Wallet. It takes a Boolean value,trueorfalse. -
setShowAppearanceSetting, an asynchronous function that controls the display of the appearance setting in the Particle Wallet. It accepts a Boolean parameter, eithertrueorfalse. -
setSupportAddToken, an async function to toggle the option to add tokens in the Particle Wallet. It takes a Boolean value oftrueorfalse.
E.g.
setDisplayTokenAddresses = async () => {
  const tokenAddresses = ["", ""];
  particleWallet.setDisplayTokenAddresses(tokenAddresses);
}

setDisplayNFTContractAddresses = async () => {
  const nftContractAddresses = ["", ""];
  particleWallet.setDisplayNFTContractAddresses(nftContractAddresses);
}

setPriorityTokenAddresses = async () => {
  const tokenAddresses = ["", ""];
  particleWallet.setPriorityTokenAddresses(tokenAddresses);
}

setPriorityNFTContractAddresses = async () => {
  const nftContractAddresses = ["", ""];
  particleWallet.setPriorityNFTContractAddresses(nftContractAddresses);
}

setShowLanguageSetting = async () => {
  particleWallet.setShowLanguageSetting(false);
}

setShowAppearanceSetting = async () => {
  particleWallet.setShowAppearanceSetting(false);
}

setSupportAddToken = async () => {
  particleWallet.setSupportAddToken(false);
}
Master reference
For a direct, raw view into every method provided through particleWallet (@particle-network/rn-wallet), below is a table containing every relevant one alongside specific parameters and a short description. For methods listed that weren't covered in the above examples, live implementation often mimics the common structure covered throughout this document.
ParticleWalleton this table refers to the importation and complete assignment of@particle-network/rn-walletIn this above examples, this has been referred to by
particleWallet.
| Class | Methods | Parameters (* indicates optional) |
|---|---|---|
| ParticleWallet | initWallet | walletMetaData |
| ParticleWallet | navigatorWallet | display |
| ParticleWallet | createSelectedWallet | publicAddress, walletType |
| ParticleWallet | navigatorTokenReceive | tokenAddress* |
| ParticleWallet | navigatorTokenSend | tokenAddress*, toAddress*, amount* |
| ParticleWallet | navigatorTokenTransactionRecords | tokenAddress* |
| ParticleWallet | navigatorNFTSend | mint, tokenId, receiverAddress*, amount* |
| ParticleWallet | navigatorNFTDetails | mint, tokenId |
| ParticleWallet | navigatorBuyCrypto | config* |
| ParticleWallet | navigatorLoginList | |
| ParticleWallet | navigatorSwap | fromTokenAddress*, toTokenAddress*, amount* |
| ParticleWallet | setShowTestNetwork | isShow* |
| ParticleWallet | setShowManageWallet | isShow* |
| ParticleWallet | setSupportChain | chainInfos |
| ParticleWallet | setPayDisabled | disabled |
| ParticleWallet | getPayDisabled | |
| ParticleWallet | setSwapDisabled | disabled |
| ParticleWallet | getSwapDisabled | |
| ParticleWallet | switchWallet | walletType, publicAddress |
| ParticleWallet | setDisplayTokenAddresses | tokenAddresses |
| ParticleWallet | setDisplayNFTContractAddresses | nftContractAddresses |
| ParticleWallet | setPriorityTokenAddresses | tokenAddresses |
| ParticleWallet | setPriorityNFTContractAddresses | nftContractAddresses |
| ParticleWallet | setShowLanguageSetting | isShow* |
| ParticleWallet | setShowAppearanceSetting | isShow* |
| ParticleWallet | setSupportAddToken | isShow* |
| ParticleWallet | setSupportWalletConnect | isEnable* |
| ParticleWallet | setWalletConnectV2ProjectId | walletConnectV2ProjectId |
| ParticleWallet | setSupportDappBrowser | isShow* |