Interacting with Particle Auth within applications made using React Native
Particle Auth for React Native
For mobile applications, both iOS and Android, leveraging React Native for end-to-end interaction with Particle's Wallet-as-a-Service is possible through the utilization of the Particle Auth React Native SDK. The Particle Auth React Native SDK is largely adjacent to the Flutter (Dart) SDK. It enables the integration of Particle's Wallet-as-a-Service within mobile applications using JavaScript, providing a potentially more accessible alternative to mobile interaction with Particle Network.
Initial configuration guides, along with various examples of utilization, are detailed below.
Getting Started
The setup process for the Particle Auth React Native SDK is relatively straightforward but deviates depending on the platform in question. However, if you've used the other Particle Auth SDKs for mobile, the general flow will feel familiar, specifically if you've used the Particle Auth Flutter SDK.
Before diving into platform-specific configuration, all Particle Auth SDKs require three standard values for initialization: projectId, clientKey, and appId, all of which can be retrieved from the Particle dashboard.
- Sign up/log in to the Particle dashboard.
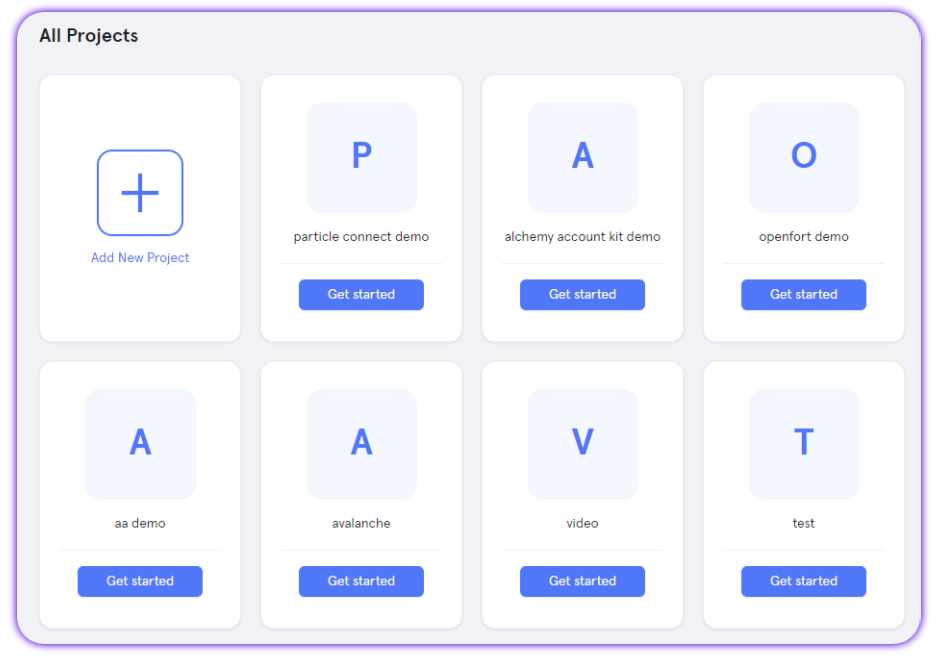
- Create a new project or enter an existing project.
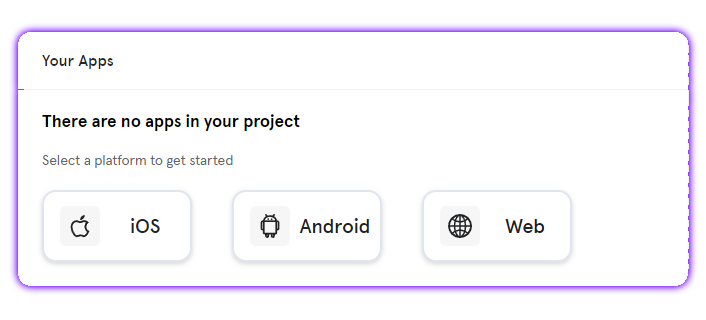
- Create a new application, or skip this step if you already have one (corresponding with your platform of choice; iOS or Android in this case).
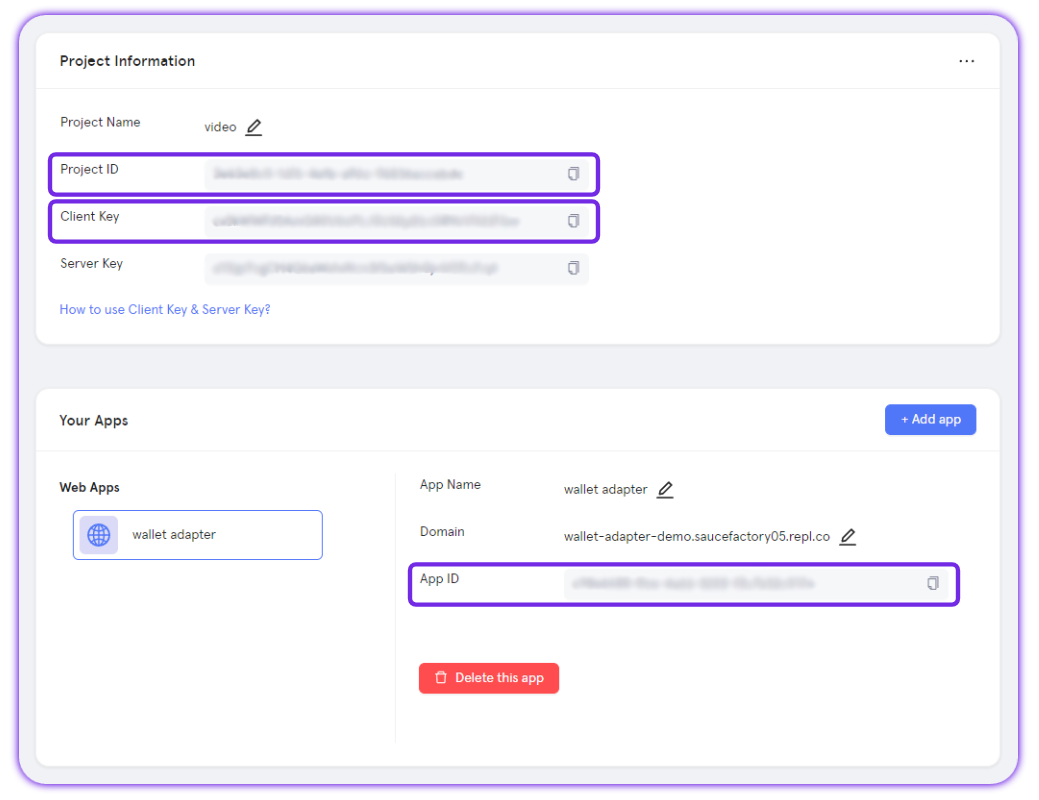
- Retrieve the project ID (
projectId), the client key (clientKey), and the application ID (appId).
Adding the Particle Auth React Native SDK to your application
Another constant in the setup process is the installation of @particle-network/rn-auth-core, either through npm or Yarn, depending on your preference.
npm install @particle-network/rn-auth-core
npm install @particle-network/rn-auth
Android configuration
If you're planning on using Android for your React Native application, ensure you meet the following prerequisites (otherwise, expect issues or non-functionality):
- Targets API Level 23 (Marshmallow) or higher.
- Uses Android 6.0 or higher.
- Uses Jetpack (Android X).
- Uses Java 11.
Once you've made sure your project meets these requirements, you'll need to move on and define the aforementioned configuration values (projectId, clientKey, and appId) within your build.grade file (generally found at ${project name}/android/app/build.gradle). These directly link your application's instance of Particle Auth with the dashboard.
Specifically, within build.gradle, you'll need to set four different values:
dataBinding, this should be enabled withenabled = true.manifestPlaceholders["PN_PROJECT_ID"], theprojectIdpreviously retrieved from the Particle dashboard.manifestPlaceholders["PN_PROJECT_CLIENT_KEY"], theclientKeypreviously retrieved from the Particle dashboard.manifestPlaceholders["PN_APP_ID"], theappIdpreviously retrieved from the Particle dashboard.
android {
  ...
  defaultConfig {
      ......
      manifestPlaceholders["PN_PROJECT_ID"] = "your project id"
      manifestPlaceholders["PN_PROJECT_CLIENT_KEY"] = "your project client key"
      manifestPlaceholders["PN_APP_ID"] = "your app id"
  }

  dataBinding {
      enabled = true
  }

}
iOS configuration
Alternatively, if you plan to use iOS for your React Native application, the underlying setup process differs slightly. Before diving in, you'll need to ensure that your project meets the following requirements:
-
Xcode 15.0 or later.
-
iOS 14 or later.
With these requirements set, you'll need to open an exported iOS project and find ios/{project name}.xcworkspace.
At the root of your Xcode project, create a new file, ParticleNetwork-Info.plist. Ensure this is marked under "Target Membership."
From here, with a fresh ParticleNetwork-Info.plist file, go ahead and fill it in with the following:
<?xml version="1.0" encoding="UTF-8"?>
<!DOCTYPE plist PUBLIC "-//Apple//DTD PLIST 1.0//EN" "http://www.apple.com/DTDs/PropertyList-1.0.dtd">
<plist version="1.0">
<dict>
	<key>PROJECT_UUID</key>
	<string>YOUR_PROJECT_UUID</string>
	<key>PROJECT_CLIENT_KEY</key>
	<string>YOUR_PROJECT_CLIENT_KEY</string>
	<key>PROJECT_APP_UUID</key>
	<string>YOUR_PROJECT_APP_UUID</string>
</dict>
</plist>
Similar to the Android configuration, you'll need to fill in PROJECT_UUID (projectId), PROJECT_CLIENT_KEY (clientKey), and PROJECT_APP_UUID (appId) with the corresponding values retrieved from the Particle dashboard.
Finally, you'll need to edit your Podfile to align with the snippet below; this is required for all iOS projects that leverage Particle Auth Core.
// add ParticleAuthCore pods to your target
pod "Thresh", '1.4.7'
pod "ParticleMPCCore", '1.4.7'
pod "ParticleAuthCore", '1.4.7'
pod "AuthCoreAdapter", '1.4.7'

pod 'ParticleAuthService', '1.4.6'
pod 'ParticleNetworkBase', '1.4.6'
pod 'ConnectCommon',  '0.2.24'

pod 'SwiftyUserDefaults', :git => 'https://github.com/SunZhiC/SwiftyUserDefaults.git', :branch => 'master'
pod 'SkeletonView', :git => 'https://github.com/SunZhiC/SkeletonView.git', :branch => 'main'


post_install do |installer|
installer.pods_project.targets.each do |target|
  target.build_configurations.each do |config|
  config.build_settings['BUILD_LIBRARY_FOR_DISTRIBUTION'] = 'YES'
    end
  end
 end
Specific note for using Expo
If you're working with Expo, your Podfile needs additional editing to ensure compatibility with Particle Auth Core, as below:
You can reference this Podfile
post_install do |installer|
  installer.pods_project.targets.each do |target|
      if target.name == 'ParticleNetworkBase' or
         target.name == 'ParticleAuthService' or
         target.name == 'ParticleWalletAPI' or
         target.name == 'ParticleWalletGUI' or
         target.name == 'ParticleWalletConnect' or

         target.name == 'ParticleConnect' or
         target.name == 'ConnectWalletConnectAdapter' or
         target.name == 'ConnectSolanaAdapter' or
         target.name == 'ConnectEVMAdapter' or
         target.name == 'ConnectPhantomAdapter' or
         target.name == 'ConnectCommon' or
         target.name == 'ParticleAuthAdapter' or

         target.name == 'WalletConnectSwiftV2' or
         target.name == 'CryptoSwift' or
         target.name == 'SwiftyUserDefaults' or
         target.name == 'RxSwift' or
         target.name == 'RxCocoa' or
	       target.name == 'RxRelay' or
         target.name == 'SwiftyJSON' or
         target.name == 'Base58.swift' or
         target.name == 'JXPagingView' or
         target.name == 'JXSegmentedView' or
         target.name == 'Starscream' or
         target.name == 'SwiftMessages' or
         target.name == 'SkeletonView' or
         target.name == 'GRDB.swift' or
         target.name == 'SnapKit' or
         target.name == 'BigInt' or
         target.name == 'Alamofire' or
	       target.name == 'RxAlamofire' or
         target.name == 'Then' or

         target.name == 'Thresh' or
         target.name == 'ParticleMPCCore' or
         target.name == 'ParticleAuthCore' or
         target.name == 'AuthCoreAdapter'

         target.build_configurations.each do |config|
              config.build_settings['BUILD_LIBRARY_FOR_DISTRIBUTION'] = 'YES'
      end
    end
end
Examples of utilization
Initialization
Now that you've configured the Particle Auth React Native SDK according to the platform you're using, you're ready to go ahead and initialize the SDK itself, unlocking the full extent of the SDK's functionality within your application. Initialization, in this case, is a two-step process, the first of which involves importing @particle-network/rn-auth, in this case as particleAuth.
import * as particleAuthCore from "@particle-network/rn-auth-core";
import * as particleAuth from "@particle-network/rn-auth";
With @particle-network/rn-auth imported, you'll need to call the init function on your representation of @particle-network/rn-auth, which in this case is particleAuth. init takes the following parameters:
chainInfo, this refers to an object containing relevant information about the primary chain to be used.ChainInfoobjects can be imported from@particle-network/chains.env, imported from@particle-network/rn-auth, and can be either:Env.ProductionEnv.StagingEnv.Dev
const chainInfo = Ethereum;
const env = Env.Production;
particleAuth.init(chainInfo, env);
particleAuthCore.init()
Connect
Onboarding a user with Particle's Wallet-as-a-Service (Particle Auth) happens through social login. This mechanism is controlled by particleAuthCore.connect. Upon calling this method, depending on specific parameters, a popup will be displayed, prompting a user to sign in with a social account, thus leading to the generation and assignment of a wallet. particleAuthCore.connect takes the following parameters:
type, the specific social login to be used. This can be either.email,.phone,.google,.apple,.jwt, or.facebook.account, whentypeis set to either.email,.phone, or.jwt, you can use theaccountparameter to pass in an expected email, phone number, or JWT. This is optional for the former two but required for.jwt.supportAuthType, the methods of authentication visible on the authentication popup UI. By default, this will be exclusive to the chosen social login method, although by passing in additional types, you can expand the UI to include the ability to log in with those as an alternative totype.socialLoginPrompt, either'none','consent', or'select_account'.loginPageConfig, the specific your project name, welcome description and project icon, also support base64 image, will show when loginType is email or phone.
import type { LoginType, SupportAuthType } from '@particle-network/rn-auth'
import * as particleAuthCore from '@particle-network/rn-auth-core';

const supportAuthType = [SupportAuthType.All];

const result = await particleAuthCore.connect(LoginType.Email, null, supportAuthType, SocialLoginPrompt.SelectAccount, {
      projectName: "React Native Example",
      description: "Welcome to login",
      imagePath: "https://connect.particle.network/icons/512.png"
    });
Disconnect
An active session (logged-in user) can be disconnected (logged out) by simply calling this method particleAuthCore.disconnect for logout,
await particleAuthCore.disconnect();
Is connected
Another important method is particleAuthCore.isConnected. This method returns a Boolean indicating whether a user is logged in.
const result = await particleAuthCore.isConnected()
Get address
To retrieve the address of a currently logged-in user (EVM address if connected to an EVM chain, otherwise their Solana address), evm.getAddress or solana.getAddresscan be called.
For first-time users, only the address of the current chain will be generated. For example, if the current chain is an EVM chain, the user will only get the EVM address upon first login. If the user also needs a Solana address, they will need to call await particleAuthCore.switchChain(Solana) to obtain it. After switching successfully, the current chain will be changed to Solana, and the user can use solana.getAddress to get the address.
import {evm, solana} from '@particle-network/rn-auth-core';

const evmAaddress = await evm.getAddress();
const solanaAddress = await solana.getAddress();
Get userInfo
If a user has logged in, their user info (email, name, wallet addresses, and other key pieces of information) can be retrieved through particleAuthCore.getUserInfo. This same response will be automatically saved to a successful call of particleAuthCore.connect.
const userInfo = await particleAuthCore.getUserInfo();
Sign message
For the simple signature of a standard message (a string), in EVM evm.personalSign can be used, passing in a raw string representing the message you'd like to be prompted for signature, in Solana solana.signMessage can be used, passing in a base58 string. Upon calling evm.personalSign or solana.signMessage, a UI element will pop up requesting signature confirmation from the user.
const message = "GM, Particle!"
const result = await evm.personalSign(message);

const result = await solana.signMessage(message);
Sign transaction
solana.signTransaction is a Solana-exclusive method for signing a transaction without pushing it to the network. solana.signTransaction simply takes a transaction string (can be a stringified object) representing a Solana transaction to be prompted for signature. Similarly to solana.signMessage, this will prompt a user with a popup outlining transaction details and requesting signature confirmation.
const result = await solana.signTransaction(transaction);
Sign all transactions
Another Solana-exclusive method, solana.signAllTransactions is the former but plural in that it takes an array of transactions (string representations) to be prompted for collective signature, without pushing them to the network.
const result = await solana.signAllTransactions(transactions);
Sign and send transaction
evm.sendTransaction is the standard method available on EVM and Solana for sending a transaction, solana.signAndSendTransaction is the standard method availab,e on Solana for sending a transaction. Alike solana.signTransaction, this will take a transaction string (serialized) to be prompted for signature. Upon receiving a signature (the user pressing "Confirm" on the resulting popup), the transaction will be sent to the network.
// An EVM transaction can either be manually constructed and serialized,
// or you can use EvmService.createTransaction(from, data, amount, to)
const result = await evm.sendTransaction(transaction);

// You can use SolanaService.serializeSolTransction and SolanaService.serializeSplTokenTransction to create solana transaction
// or create transaction by yourself.
const result = await solana.signAndSendTransaction(transaction);
Sign typed data
evm.signTypedData is an EVM-exclusive method for signing structured (typed) data, as opposed to a raw string with evm.personalSign. This is a parallel method to eth_signTypedData, specifically supporting v4.
evm.signTypedData takes a string representing typed data to be prompted for signature (can be a stringified object) alongside the version of eth_signTypedData to be used.
const result = await particleAuth.signTypedData(typedData);
Set chainInfo
If you'd like to switch chains post-login/initialization, you'll need to call either particleAuth.setChainInfo for synchronous (local) chain switching, or particleAuthCore.switchChainInfo for asynchronous (server-side) chain switching. These will override the original primary chain selected within theparticleAuth.init.
const chainInfo = SolanaDevnet;
const result = await particleAuthCore.switchChain(chainInfo);

const result = await particleAuth.setChainInfo(chainInfo);
Get chainInfo
To retrieve an object containing the information for the currently connected chain, particleAuth.getChainInfo can be used.
const result = await particleAuth.getChainInfo();
Open account and security page
Wallets generated with Particle Auth can be subject to a plethora of security settings, including the linkage of additional social accounts, setting a master password, payment password, and so on. To provide a user with a general, all-encompassing interface in which all security and account settings can be accessed, you'll need to use particleAuthCore.openAccountAndSecurity.
await particleAuthCore.openAccountAndSecurity();
Set language
The language used within the modal (popups, wallet UI, security config, etc.) can also be changed; this is done with particleAuth.setLanguage and will take either "en", "zh_hans", "zh_hant", "ja", or "ko".
particleAuth.setLanguage(language);
Has master password, payment password
Additionally, a Boolean representing whether or not a user has set a master password (password upon login), payment password (password upon state-changing signature), or security account (additional phone number or email set and verified for added authentication upon security changes) can be retrieved through two ways:
- Local retrieval with
particleAuthCore.hasMasterPasswordandparticleAuthCore.hasPaymentPassword.
const hasMasterPassword = await particleAuthCore.hasMasterPassword();
const hasPaymentPassword = await particleAuthCore.hasPaymentPassword();
In some cases, you may want a user to set a master password or payment password (perhaps both), and thus need to either suggest or force this upon them. To do this, you'll need to use particleAuth.setSecurityAccountConfig, passing in two integers:
promptSettingWhenSign, an integer in the range of 0 to 3 (inclusive).promptMasterPasswordSettingWhenSign, an integer in the range of 0 to 3 (inclusive).
For both of these parameters, the specific integer chosen dictates the degree to which the user is suggested to set these passwords. With 0, these will never be suggested, 1 will suggest setting the corresponding password upon initial registration/login, 2 will show it upon every login (or for a payment password, for every signature), and 3 will force the user to go through the process of setting the password.
EvmService utilization examples
EvmService utilization examplesAlso present within @particle-network/rn-auth is EvmService, an object for facilitating additional on-chain interaction, leveraging standard and enhanced RPC endpoints. EvmService can either be accessed through a complete (*) import (such as is shown above) by using particleAuth.EvmService.{method} or individually importing it from @particle-network/rn-auth.
For a full list of methods available through
EvmService, take a look at theEvmServiceSDK Reference.
Estimate gas
Given a standard transaction structure (detached set of values, as shown below), gas estimation can be run to simulate and retrieve the volume of gas to be consumed by a specified transaction (wrapper for eth_estimateGas). This is done viaEvmService.estimateGas.
const result = await EvmService.estimateGas(from, to, value, data);
Get suggested gas fees
To retrieve categorized gas price suggestions (3 categories scaling from low to high) based upon current network conditions, you can call EvmService.suggestedGasFees. This will return a JSON object containing the above data (useful for transaction construction).
const result = await EvmService.suggestedGasFee();
Get tokens and NFTs
EvmService also extends to Data API methods such as getTokensAndNFTs, which returns a highly detailed JSON list of ERC20 tokens and ERC721 NFTs belonging to a specified address. This is accessible through calling EvmService.getTokensAndNFTs and passing in a given public address from which to retrieve the tokens and NFTs of. Also, you can get tokens using EvmService.getTokens or NFTs using EvmService.getNFTs.
const result = await EvmService.getTokensAndNFTs(publicAddress);

const result = await EvmService.getTokens(publicAddress);

const getNFTs = await EvmService.getNFTs(publicAddress);
Get transactions by address
Similar to the former method, EvmService.getTransactionsByAddress enables the retrieval of a detailed JSON response containing the full list of transactions involving a specified address.
const result = await EvmService.getTransactionsByAddress(publicAddress);
Create transaction
EvmService.createTransaction can help you create an evm transaction, it takes the following parameters:
from, the specific social login to be used. This can be either.email,.phone,.google,.apple,.jwt, or.facebook.data, contract transaction parameter, if you want to send native, pass 0xvalue, native amountto, if it is a contract transaction,tois the contract address, if it is a native transaction,tois the receiver address.gasFeeLevel, gas fee level, support low, medium and high, default value is high.
const transaction = await EvmService.createTransaction(from, '0x', amount, to);
Master reference
For a direct, raw view into every method provided through particleAuth, below is a table containing every relevant method alongside specific parameters and a short description. For methods listed that weren't covered in the above examples, live implementation often mimics the common structure covered throughout this document.
ParticleAuthrefers to the importation and complete assignment of@particle-network/rn-authIn this above examples, this has been referred to by
particleAuth.
| Class | Methods | Parameters (* indicates optional) |
|---|---|---|
| ParticleAuth | init | chainInfo, env |
| ParticleAuth | setChainInfo | chainInfo |
| ParticleAuth | getChainInfo | |
| ParticleAuth | getChainId | |
| ParticleAuth | setChainInfoAsync | chainInfo |
| ParticleAuth | login | type, account, supportAuthType, socialLoginPrompt, authorization |
| ParticleAuth | logout | |
| ParticleAuth | fastLogout | |
| ParticleAuth | isLogin | |
| ParticleAuth | isLoginAsync | |
| ParticleAuth | signMessage | message |
| ParticleAuth | signMessageUnique | message |
| ParticleAuth | signTransaction | transaction |
| ParticleAuth | signAllTransactions | transactions |
| ParticleAuth | signAndSendTransaction | transaction, feeMode |
| ParticleAuth | batchSendTransactions | transactions, feeMode |
| ParticleAuth | signTypedData | typedData, version |
| ParticleAuth | openAccountAndSecurity | |
| ParticleAuth | getAddress | |
| ParticleAuth | getUserInfo | |
| ParticleAuth | setModalPresentStyle | style |
| ParticleAuth | setMediumScreen | isMediumScreen |
| ParticleAuth | setLanguage | language |
| ParticleAuth | setAppearance | appearance |
| ParticleAuth | setFiatCoin | fiatCoin |
| ParticleAuth | setWebAuthConfig | displayWallet, appearance |
| ParticleAuth | openWebWallet | webStyle |
| ParticleAuth | setSecurityAccountConfig | promptSettingWhenSign (int, 0-3), promptMasterPasswordSettingWhenSign (int, 0-3) |
| ParticleAuth | hasMasterPassword | |
| ParticleAuth | hasPaymentPassword | |
| ParticleAuth | hasSecurityAccount | |
| ParticleAuth | getSecurityAccount |