Learn More About Universal Accounts
What are Universal Accounts, how do they work, and what problems do they solve?
The following examples use a React-based app alongside Particle Auth for authentication and wallet connection.However, the Universal Accounts SDK is provider-agnostic. You can also use Particle Connect, Web3Modal, RainbowKit, or any signer.The SDK can also be used server-side to construct and sign transactions programmatically.
Understand account modes
Universal Accounts support two execution modes. Choosing the right one determines how the user’s account behaves.
Initialize Universal Accounts
Once connected, pass the user’s EOA address to the SDK and configure your project details.
Getting Started
Installation
Once your app is set up, install the Universal Accounts SDK:The SDK depends on
ethers.js internally, but you are not required to use it directly. You can use any provider or signer that fits your setup.Account Modes
Universal Accounts can operate in two modes, depending on your wallet setup and execution environment:7702 Mode (Default)
Within this mode:- Your user’s existing EOA is upgraded to act directly as a Universal Account.
- The EOA address and Universal Account address are the same.
- Assets already held at the user’s EOA are immediately usable on their Universal Account—without transferring assets.
- No smart account deployments needed.
Smart Account Mode
Within this mode:- A separate smart account is attached to your user’s EOA.
- The smart account has its own address, separate from the EOA.
- Users must transfer assets to the smart account before using it.
Initializing and Configuring Universal Accounts
To configure Universal Accounts:- Import the UniversalAccount class in your app:
- The Universal Accounts SDK requires Particle project credentials from the Particle Dashboard. To retrieve your project credentials:
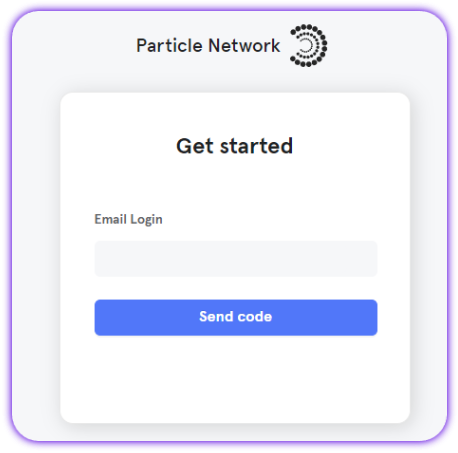
Access the Particle Dashboard
Access the Particle Dashboard

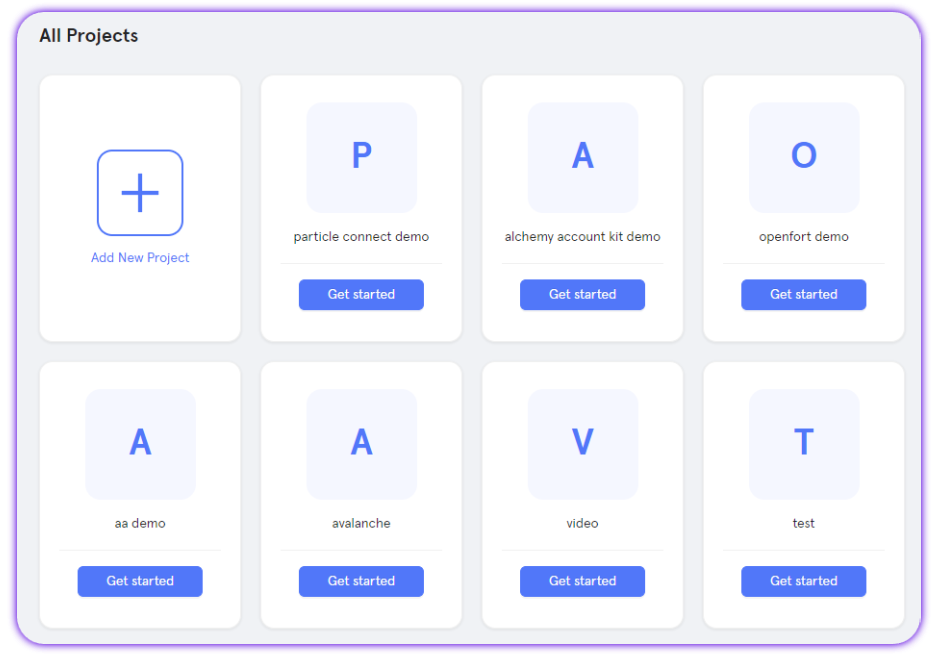
Create or open a project
Create or open a project

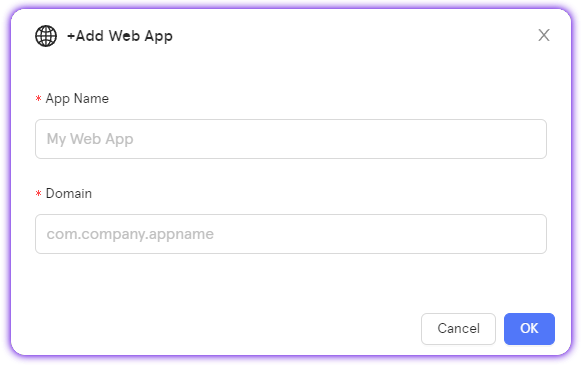
Create a web application (or skip if already created)
Create a web application (or skip if already created)

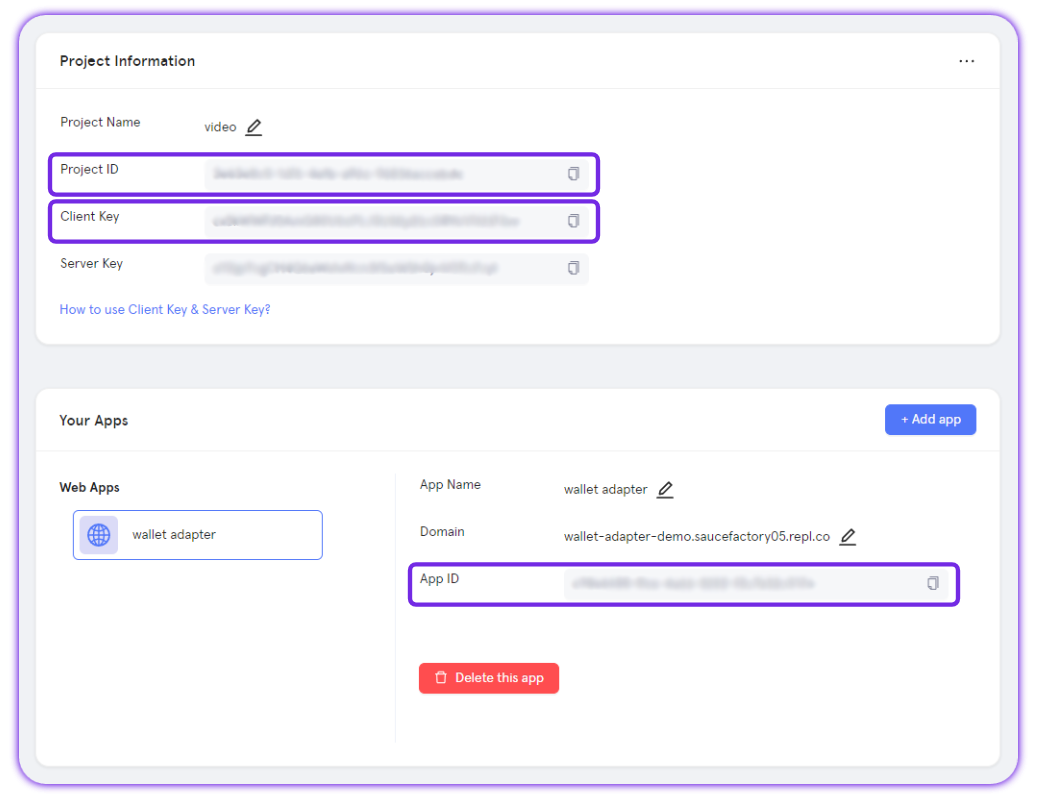
Retrieve project credentials
Retrieve project credentials

- Then, initialize Universal Accounts using your preferred mode:
EIP-7702 is the default mode for Universal Accounts.
In this mode, the EOA used for authentication is upgraded to act directly as the Universal Account. However, if you wish to use Smart Account mode, simply set “useEIP7702” to “false”.
The section below dives deeper into the differences between both modes.
In this mode, the EOA used for authentication is upgraded to act directly as the Universal Account. However, if you wish to use Smart Account mode, simply set “useEIP7702” to “false”.
The section below dives deeper into the differences between both modes.
- You can now use the
uainstance to fetch Universal Account data (addresses and unified balances) and to send transactions across supported chains.
About 7702 Mode (Default)
In 7702 mode, the EOA address used for authentication is the Universal Account. All Universal Account features—such as chain abstraction, unified balances, and gas abstraction—are applied directly to the user’s original EOA. Using 7702 mode requires you to authorize the user’s EOA to act as the Universal Account on the specified chain before transacting. Once this delegation is successful, all subsequent transactions will automatically execute on that chain.To authorize the 7702 mode automatically on new chains, run the below pattern when sending transactions:
Serverside examples using EIP-7702
Find serverside examples using Universal Accounts in EIP-7702 mode.
7702 mode example using Privy's embedded wallet
End-to-end example showing how to use 7702 mode with Privy’s embedded wallet.
Verifying EIP-7702 delegation
To check whether EIP-7702 delegation is active for a Universal Account, query the registered deployments:Smart Account Mode (JSON-RPC wallets)
This mode exists for compatibility with JSON-RPC wallets, but does not provide the same zero-friction experience as 7702 mode.As mentioned above, if you need to support Smart Account mode, simply change the following variable upon initialization:
- A separate smart account is created and attached to the EOA.
- The smart account has its own address.
- Users must transfer assets to the smart account before use.
Mode Comparison
| Mode | Account Address | Asset Transfer Required | JSON-RPC Support |
|---|---|---|---|
| 7702 (default) | Same as EOA | No | No |
| Smart Account | Separate | Yes | Yes |
Check Out UA Initialization in This Sample Repository
Check Out UA Initialization in This Sample Repository
Sample Next.js app using Particle Auth with Universal Accounts.
Control which tokens are used for swaps
When initializing a Universal Account, you can control which tokens are eligible to be used as the source for swap operations. To do this, set theusePrimaryTokens field inside the tradeConfig object. This lets you restrict swap logic to specific tokens (e.g. only allow SOL to be spent, not USDT or ETH).
Example:
- Ensure predictable token usage during swaps.
- Prevent certain tokens from being auto-selected as swap input.
- Customize the user experience around token prioritization.
Fetching a Universal Account’s Addresses
A Universal Account is composed of multiple addresses, each relevant to a specific interaction layer:- Owner Address: The EOA that owns the Universal Account and signs transactions (e.g., from MetaMask or via a social login).
- EVM Universal Address: The UA address used on EVM-compatible chains.
- Solana Universal Address: The UA address used on Solana.
The EVM and Solana Universal Addresses are distinct due to the way deposits work on each network.You can deposit any EVM token to the EVM Universal Address, and any Solana token to the Solana Universal Address. EVM and Solana assets will be accessible through the same UA instance, and balance lookups and transactions will remain unified at the SDK level.
UA Info Management
This repository includes a sample Next.js app with social logins via Particle Auth alongside Universal Accounts.
Primary Assets & Unified Balance
Universal Accounts can hold all assets across supported chains.Among these, Primary Assets are special: they have the deepest liquidity and can be used as the basis for cross-chain swaps, liquidity routing, and gas payments.
Why this matters: You can give users a single, unified balance of these spendable assets—regardless of which chain they’re actually on.
The full list of supported Primary Assets is available on the Supported chains and Primary Assets page.
Fetch Unified Balance (quick way)
The easiest way to display the maximum amount a user can spend in one go (the sum of their Primary Assets across chains) is by fetching their Unified Balance:Inspect Primary Assets in Detail
If you need more than just the total,getPrimaryAssets() also returns a detailed list of assets:
AssetInfo entry aggregates a token across chains, including per-chain breakdowns.
Expand to see the full structure
Expand to see the full structure
| Field | Description |
|---|---|
tokenType | Token identifier (e.g., “eth”, “usdt”) |
price | Current USD price |
amount | Total amount across chains (human-readable) |
amountInUSD | Total USD value |
chainAggregation | Per-chain balance breakdowns |
chainAggregation format
Each chainAggregation entry details the balance and metadata of the token on a specific chain:
Expand to see the full structure
Expand to see the full structure
| Field | Description |
|---|---|
token.chainId | Chain ID |
token.address | Token contract address |
amount | Token amount (human-readable float) |
amountInUSD | USD value |
rawAmount | Token amount in raw units (integer, stringified) |
token.decimals | ERC-20 decimals |
token.realDecimals | Adjusted decimals for display |
token.isMultiChain | Part of multi-chain registry |
token.isMultiChainDefault | Default canonical version across chains |
For native assets like
ETH, the token.address field will be 0x0000000000000000000000000000000000000000.Fetch Primary Assets in a Sample App
See how to call
getPrimaryAssets() in a real Next.js app using Particle Auth and Universal Accounts.Parse and Display Asset Balances
Check out how Primary Asset data is parsed and rendered in this sample app.
Sending a Transfer Transaction
TheUniversal Accounts SDK lets you send tokens to any address across supported chains using the createTransferTransaction() method. Like other transactions, transfers don’t require the user to hold assets or gas tokens on the destination chain—liquidity and gas are abstracted behind the scenes.
Once you construct the transfer, the SDK returns a rootHash to sign. You sign it with the connected EOA (e.g., from Particle Auth), then call sendTransaction() to broadcast:
For native assets like
ETH, the token address will be 0x0000000000000000000000000000000000000000.TransactionResult will include the transaction ID, as well as metadata like token movements and fee breakdowns. You can find more details about this in the TransactionResult section below.
View a Sample Transfer Transaction
See how to send cross-chain transfers in a demo Next.js app leveraging Universal Accounts and Particle Auth.
Sending a Custom Payable Transaction
The Universal Accounts SDK supports sending contract interactions, including payable transactions, through thecreateUniversalTransaction() method. In this example, we interact with a smart contract on the Base Mainnet that requires exactly 0.0000001 ETH to execute a checkIn() function.
By specifying an expectTokens array, the SDK ensures the account has the necessary ETH on Base—even if the user’s assets are on other chains or in different tokens (e.g., USDC, USDT). The SDK will handle all additional required cross-chain routing and token conversion under the hood.
Once the transaction is created, it will return a rootHash value representing the payload to be signed. You can then use a signer (e.g., Particle Auth) to sign this hash and broadcast it using sendTransaction().
The following code snippet shows how to use the Universal Accounts SDK to send a payable transaction:
TransactionResult will include the transaction’s ID and metadata like token movements and fee breakdowns.
Sending a Buy Transaction
The Universal Accounts SDK supports buy/swap transactions directly through thecreateBuyTransaction() method. This allows you to programmatically route an amount in USD into a target token (e.g., USDT on Arbitrum), without requiring the user to hold funds on the destination chain.
Once the transaction is created, it returns a rootHash value representing the payload to be signed. You then use your signer (in this case, Particle Auth) to sign the message, and pass the result into sendTransaction() to broadcast it:
You can specify the specific tokens you want to use as source for the swap by setting the
usePrimaryTokens property in the tradeConfig object when initializing the Universal Account.sendTransaction method will then return a TransactionResult object, which includes the transaction ID and other metadata.
Sample Swap Transaction
See how to initiate a swap transaction in a demo Next.js app using both Particle Auth and Universal Accounts.
Sending a Sell Transaction
The Universal Accounts SDK supports sell/swap transactions through thecreateSellTransaction() method. This allows you to programmatically sell a token (e.g., ARB on Arbitrum) into a target primary asset, with the transaction routed through Particle’s Chain Abstraction layer.
Once the transaction is created, it returns a rootHash payload that needs to be signed. You then use your signer (e.g., Particle Auth) to sign and pass it into sendTransaction() to broadcast.
The amount you specify is the raw token amount to be sold (no decimals adjustment needed). Ensure the Universal Account has a sufficient balance of the token before calling
createSellTransaction().sendTransaction() method returns a TransactionResult object with the transaction ID and other metadata.
Sending a Conversion Transaction
You can convert Primary Assets with thecreateConvertTransaction method.
The example below demonstrates how to convert any primary asset into another—USDC on Arbitrum, in this case:
Solana Transactions
Universal Accounts support Solana as well. You can swap any token to and from SOL using thecreateTransferTransaction() method, even without assets on Solana.
Here is an example:
Even if your Universal Account doesn’t hold SOL for gas, you can still purchase SOL or any other Solana token. Universal Accounts will automatically handle routing and liquidity across chains to cover gas fees.
rootHash.
You can combine this swap transaction with a SOL transfer to automatically convert EVM-based assets to SOL and send them to another account in a single flow.
Transaction Preview
The transaction object returned by methods likecreateTransferTransaction() provides a full preview of the transaction before it’s executed. This includes key details such as estimated fees, token transfers, and other relevant metadata—allowing you to display clear, actionable information to users before confirmation.
For example:
page.tsx
page.tsx
For a full breakdown of the preview structure and practical usage examples, see the Preview Transaction Details with Universal Accounts guide.
sendTransaction() Response Structure
After broadcasting a transaction with sendTransaction(), the SDK will return a detailed object containing its execution status, fee breakdowns, token flows, and analytics.
Below is a breakdown of the key fields within this object:
Top-Level Fields
Top-Level Fields
| Field | Description |
|---|---|
transactionId | Unique ID of the transaction (used to query status or activity details) |
mode | Network mode, typically "mainnet" or "testnet" |
sender / receiver | Address that initiated and received the transaction (usually same) |
type | Transaction type (e.g. "universal") |
status | Execution status code (internal enum) |
tag | Transaction tag (e.g., "buy" or "swap") |
created_at / updated_at | ISO timestamps for lifecycle tracking |
`fees` (Cost Breakdown)
`fees` (Cost Breakdown)
| Field | Description |
|---|---|
totals.feeTokenAmountInUSD | Total fee in USD |
feeTokens[] | List of tokens used to pay fees, with symbols and USD values |
freeGasFee / freeServiceFee | Whether any component was waived |
`depositTokens` / `lendingTokens`
`depositTokens` / `lendingTokens`
Tokens deducted from the user’s account to fund the transaction. Each entry includes:
token.symboltoken.chainIdamountandamountInUSD- Full metadata (decimals, icon, etc.)
tokenChanges (Before/After Effects)
tokenChanges (Before/After Effects)
Provides the most useful high-level insight into what changed:
| Field | Description |
|---|---|
decr[] | Tokens deducted from the user (chain, token, amount) |
incr[] | Tokens received by the user |
swaps[] | Swap routes (e.g. from USDC to USDT via 1inch) |
tokenBalances[] | Final post-transaction token balances |
Analytics & Valuation
Analytics & Valuation
| Field | Description |
|---|---|
slippage | Slippage used for the route (in basis points) |
totalFeeInUSD | Final USD fee value |
totalDecrAmountInUSD | Total USD value deducted |
totalIncrAmountInUSD | Total USD value received |
priceImpact | Estimated price impact (0 if none) |
minReceiveAmountInUSD | Minimum expected amount (to be received, post-slippage) in USD |
minReceiveToken | Token targeted by the buy/swap action |
`Explorer / Activity Link`
`Explorer / Activity Link`
You can construct a link to see the activity on UniversalX:
Fetching Transaction History
The Universal Accounts SDK allows you to retrieve a user’s transaction history directly from their Universal Account.You can query both general transactions (all activity) and token-specific transactions (activity related to a specific token). This is useful for displaying activity feeds, wallet histories, or user analytics dashboards.
Fetch All Transactions
To retrieve the complete transaction history of a Universal Account, use thegetTransactions(page, pageSize) method:
pageSize argument.
Fetch Token-Specific Transactions
To filter the transaction history by a specific token and chain, use thegetTokenTransactions() method:
nextPageToken you can use to fetch additional results.
Pagination Example
To retrieve the next page of token-specific transactions, simply pass the returnednextPageToken:
Both
Always check for the
getTransactions() and getTokenTransactions() support pagination.Always check for the
nextPageToken field in the response to determine if more results are available.Fetching Transaction Details
To retrieve the details of a specific transaction, use thegetTransaction(transactionId) method:
The
transactionId is the transaction’s unique identifier; you can retrieve it from the transaction history.TransactionDetails object containing detailed information about the transaction. You can then use this object to display transaction details in your application.
Using Particle Connect with Universal Accounts
The following example uses Particle Connect instead of Particle Auth. It shows how to sign and send a Universal Account transaction using a connected wallet.
useWallets() hook. The primaryWallet object exposes a walletClient, which acts as the signer.
This lets you sign the Universal Account transaction payload (rootHash) using any wallet connected via Particle Connect.
The following code snippet shows how to use the Universal Accounts SDK to sign a transaction with Particle Connect:
Using Universal Accounts in the backend
The Universal Accounts SDK can also be used in backend environments to construct and sign transactions programmatically. The example below demonstrates usage with ethers.js and a private key in Node.js:Registering a UniversalX Account
The Universal Accounts SDK also allows you to register an account on UniversalX, a chain-abstracted trading platform built upon Universal Accounts. This can automatically onboard your users into UniversalX when they create or initialize a Universal Account. UniversalX registration is optional and only needs to be done once per UA.You can also pass an invite code (
"000000" by default) if you have one.