> ## Documentation Index
> Fetch the complete documentation index at: https://developers.particle.network/llms.txt
> Use this file to discover all available pages before exploring further.

# Flutter Quickstart

# Quickstart: Implementing Particle Connect within applications built with Flutter

Particle Connect is the flagship SDK driving one-click onboarding through either social logins or standard wallet connection; in just a few minutes, Particle Connect can be implemented to offer a unified modal for bringing users into your dApp.

This document will go through the step-by-step process of configuring, initializing, and using Particle Connect with Flutter.

<Note>
  For complete documentation covering the implementation of Particle Connect on Flutter in more depth, head over to the [Flutter SDK reference](/social-logins/connect/mobile/flutter).
</Note>

***

<Steps>
  <Step title="Installing Particle Connect">
    To start, you'll need to add `particle_connect` to your Flutter application; this will need to be done before moving onto platform-specific configuration.

    ```shell Terminal theme={null}
    flutter pub add particle_connect
    ```
  </Step>

  <Step title="Configuring Particle Connect">
    After adding and installing the SDK, you're ready to move onto configuration; this will differ depending on the platform you intend on using (iOS or Android).

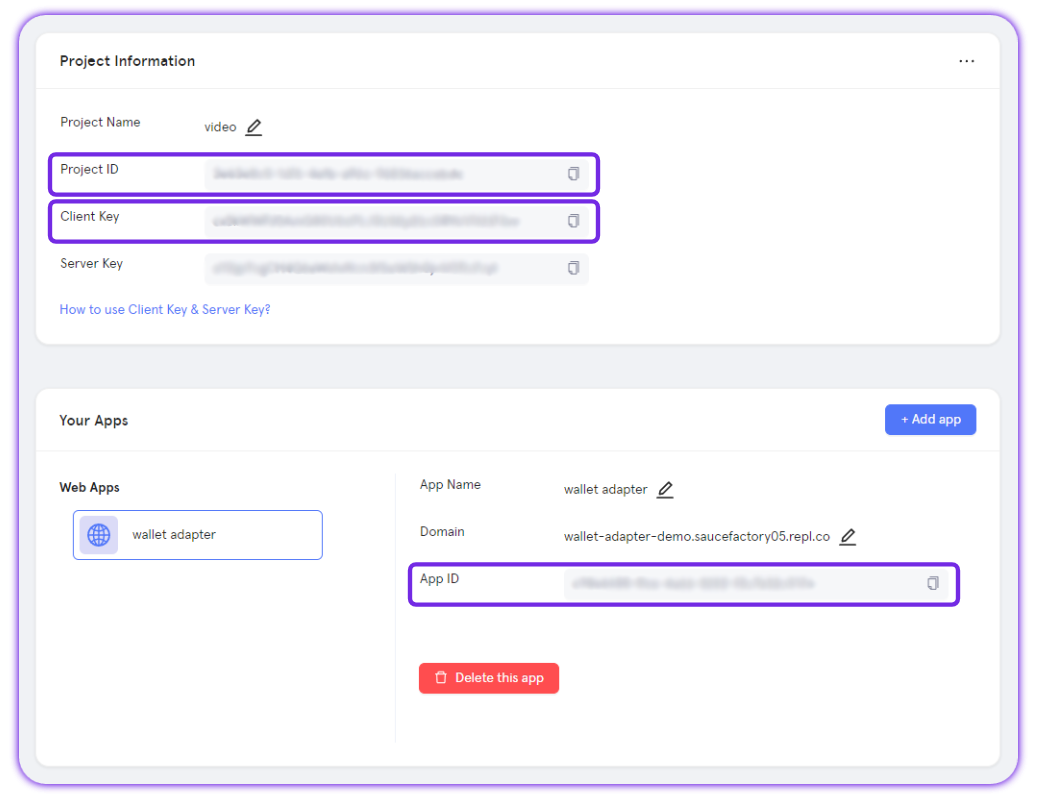
    But beforehand, you'll need to retrieve three key values from the [Particle dashboard](https://dashboard.particle.network): your project ID, client key, and app ID. These are used to authenticate your instance of Particle Connect and connect your project to the dashboard; these are required to properly initialize the SDK, regardless of platform.

    To grab these keys, follow the steps outlined below:

    <AccordionGroup>
      <Accordion title="Access the Particle Dashboard">
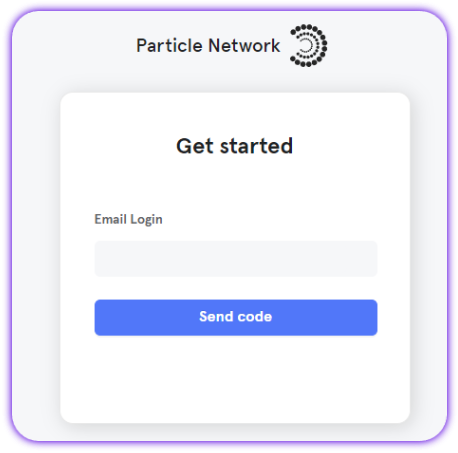
        Sign up or Log in into the [Particle dashboard](https://dashboard.particle.network)

        <div className="flex justify-center">
          <img className="block h-64 dark:hidden" src="https://mintcdn.com/particlenetwork-fccf74d2/hR-XK15Ve4E3bk8E/social-logins/images/login.png?fit=max&auto=format&n=hR-XK15Ve4E3bk8E&q=85&s=82a68a9e5fce546a26db56e74d7c3b94" alt="Login into Particle." width="458" height="453" data-path="social-logins/images/login.png" />

          <img className="hidden h-64 dark:block" src="https://mintcdn.com/particlenetwork-fccf74d2/hR-XK15Ve4E3bk8E/social-logins/images/login.png?fit=max&auto=format&n=hR-XK15Ve4E3bk8E&q=85&s=82a68a9e5fce546a26db56e74d7c3b94" alt="Login into Particle." width="458" height="453" data-path="social-logins/images/login.png" />
        </div>
      </Accordion>

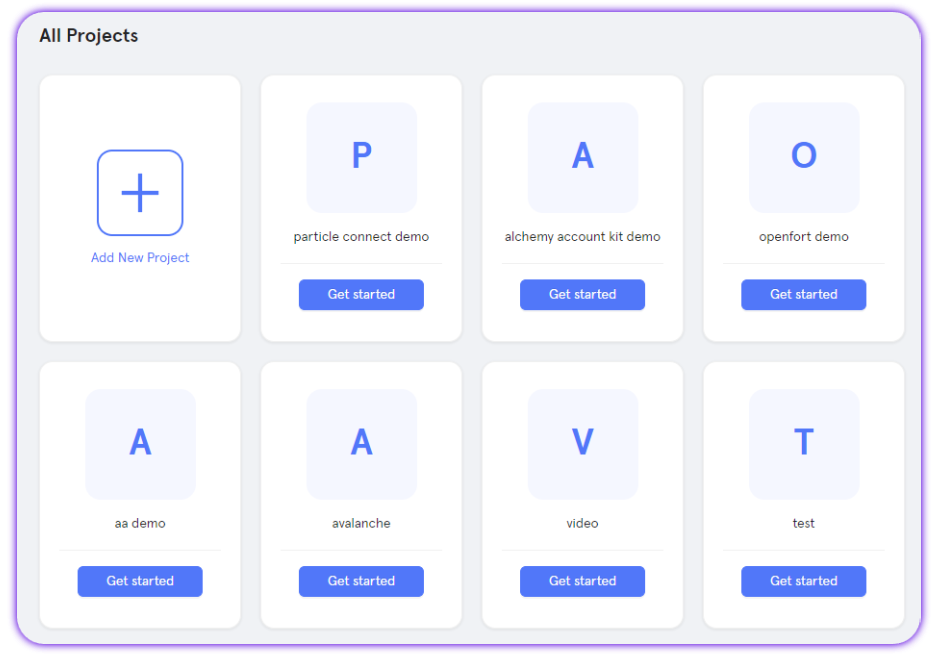
      <Accordion title="Create a new project or enter an existing project">
        <div className="flex justify-center">
          <img className="block h-64 dark:hidden" src="https://mintcdn.com/particlenetwork-fccf74d2/hR-XK15Ve4E3bk8E/social-logins/images/project.png?fit=max&auto=format&n=hR-XK15Ve4E3bk8E&q=85&s=1b5cd03116f224e1cba3a88a04a1f0a5" alt="Create Particle project." width="939" height="657" data-path="social-logins/images/project.png" />

          <img className="hidden h-64 dark:block" src="https://mintcdn.com/particlenetwork-fccf74d2/hR-XK15Ve4E3bk8E/social-logins/images/project.png?fit=max&auto=format&n=hR-XK15Ve4E3bk8E&q=85&s=1b5cd03116f224e1cba3a88a04a1f0a5" alt="Create Particle project." width="939" height="657" data-path="social-logins/images/project.png" />
        </div>
      </Accordion>

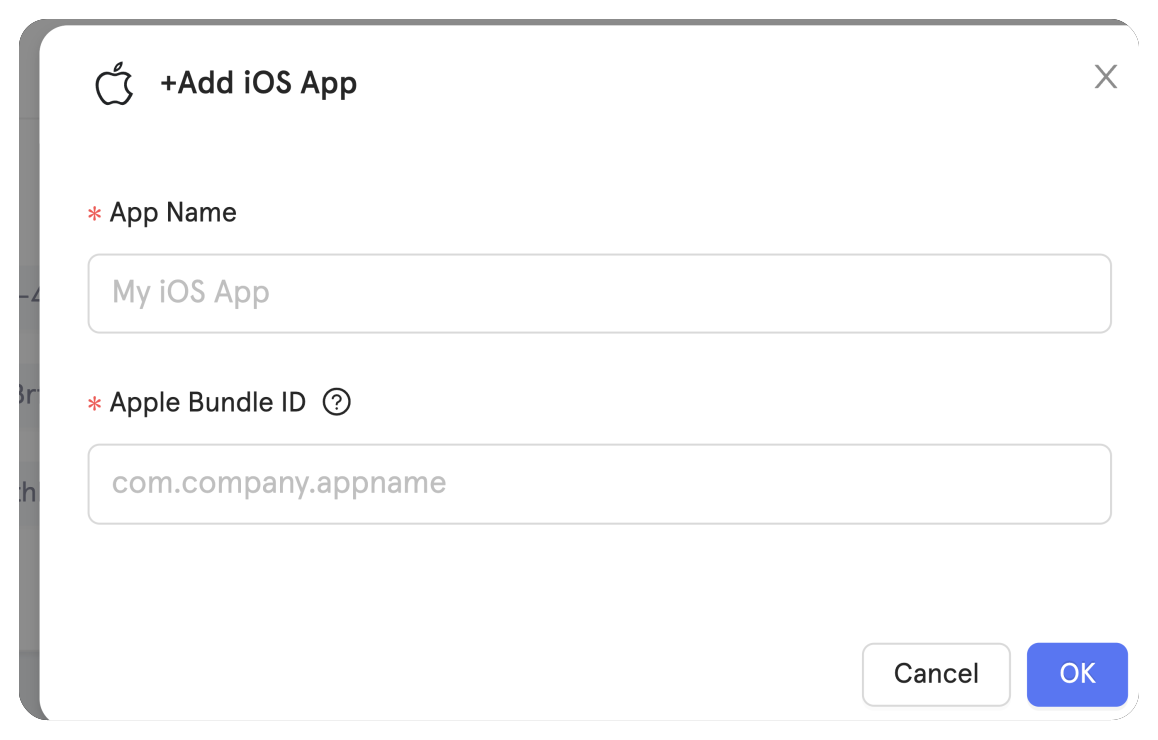
      <Accordion title="Create a new iOS/Android application, or skip this step if you already have one">
        <div className="flex justify-center">
          <img className="block h-64 dark:hidden" src="https://mintcdn.com/particlenetwork-fccf74d2/Y2qQyWSdsJpFBZYU/social-logins/images/ios-app.svg?fit=max&auto=format&n=Y2qQyWSdsJpFBZYU&q=85&s=8a7ab16a953807b947f43ad521113ccf" alt="Create iOS app." width="1158" height="740" data-path="social-logins/images/ios-app.svg" />

          <img className="hidden h-64 dark:block" src="https://mintcdn.com/particlenetwork-fccf74d2/Y2qQyWSdsJpFBZYU/social-logins/images/ios-app.svg?fit=max&auto=format&n=Y2qQyWSdsJpFBZYU&q=85&s=8a7ab16a953807b947f43ad521113ccf" alt="Create iOS app." width="1158" height="740" data-path="social-logins/images/ios-app.svg" />
        </div>
      </Accordion>

      <Accordion title="Retrieve the project ID, client key, and application ID">
        <div className="flex justify-center">
          <img className="block h-64 dark:hidden" src="https://mintcdn.com/particlenetwork-fccf74d2/hR-XK15Ve4E3bk8E/social-logins/images/credentials.png?fit=max&auto=format&n=hR-XK15Ve4E3bk8E&q=85&s=c196b87c62dc17aae0f624035e3a2c19" alt="Find app's credentials." width="1039" height="800" data-path="social-logins/images/credentials.png" />

          <img className="hidden h-64 dark:block" src="https://mintcdn.com/particlenetwork-fccf74d2/hR-XK15Ve4E3bk8E/social-logins/images/credentials.png?fit=max&auto=format&n=hR-XK15Ve4E3bk8E&q=85&s=c196b87c62dc17aae0f624035e3a2c19" alt="Find app's credentials." width="1039" height="800" data-path="social-logins/images/credentials.png" />
        </div>
      </Accordion>
    </AccordionGroup>

    For more information on the Particle dashboard, take a look at the [dashboard quickstart](/social-logins/dashboard).

    ***

    ### Android

    If you're planning on using Android for your React Native application, ensure you meet the following prerequisites (otherwise, expect compatibility issues):

    #### Prerequisites

    * minSdkVersion **23** or higher.
    * compileSdkVersion, targetSdkVersion **34** or higher.
    * JavaVersion **17**.
    * [Jetpack (AndroidX)](https://developer.android.com/jetpack/androidx/migrate?authuser=0).
    * Android Gradle Plugin Version: **8.5.1** or higher.
    * Gradle Version: **8.9** or higher.

    To configure Particle Connect and prepare for initialization, you can begin by going ahead and opening your `build.gradle` file, often found at the following file path: `${project name}/android/app/build.gradle`

    Within your `build.gradle` file, you'll need to add four new lines to ensure Particle Connect runs properly:

    1. `minSdkVersion`. In most cases, this will be set to `23`.
    2. `manifestPlaceholders["PN_PROJECT_ID"]`, the project ID previously retrieved from the Particle dashboard.
    3. `manifestPlaceholders["PN_PROJECT_CLIENT_KEY"]`, the client key previously retrieved from the Particle dashboard.
    4. `manifestPlaceholders["PN_APP_ID"]`, the app ID previously retrieved from the Particle dashboard.

    An example of this has been included below.

    ```groovy build.gradle theme={null}
    // Example
    defaultConfig {
      applicationId "com.example.particle_auth_test"

      minSdkVersion 23 // Required
      targetSdkVersion flutter.targetSdkVersion
      versionCode flutterVersionCode.toInteger()
      versionName flutterVersionName

      manifestPlaceholders["PN_PROJECT_ID"] = "YOUR PROJECT ID"
      manifestPlaceholders["PN_PROJECT_CLIENT_KEY"] = "YOUR CLIENT KEY"
      manifestPlaceholders["PN_APP_ID"] = "YOUR APP ID"
    }
    ```

    Additionally, staying within your `build.gradle` file, you'll need to ensure that you're using version 17 of Java in both `compileOptions` and `kotlinOptions`, alongside enabling `dataBinding`.

    ```groovy build.gradle theme={null}
    // Example
    compileOptions {
      sourceCompatibility JavaVersion.VERSION_17
      targetCompatibility JavaVersion.VERSION_17
    }

    kotlinOptions {
      jvmTarget = JavaVersion.VERSION_17.toString()
    }

    dataBinding {
      enabled = true
    }
    ```

    ***

    ### iOS

    Before beginning, ensure your project meets the following prerequisites:

    * **Xcode 15.0** or later.

    * **iOS 14** or later.

    With these requirements set, you'll need to open an exported iOS project and find `ios/{project name}.xcworkspace`.

    <Steps>
      <Step title="Configuring ParticleNetwork-info.plist">
        At the root of your Xcode project, create a new file, `ParticleNetwork-Info.plist` . Ensure this is marked under "Target Membership."

        From here, with a fresh `ParticleNetwork-Info.plist` file, go ahead and fill it in with the values previously retrieved from the [Particle dashboard](https://dashboard.particle.network):

        ```xml ParticleNetwork-Info.plist theme={null}
        <?xml version="1.0" encoding="UTF-8"?>
        <!DOCTYPE plist PUBLIC "-//Apple//DTD PLIST 1.0//EN" "http://www.apple.com/DTDs/PropertyList-1.0.dtd">
        <plist version="1.0">
        <dict>
          <key>PROJECT_UUID</key>
          <string>YOUR_PROJECT_UUID</string>
          <key>PROJECT_CLIENT_KEY</key>
          <string>YOUR_PROJECT_CLIENT_KEY</string>
          <key>PROJECT_APP_UUID</key>
          <string>YOUR_PROJECT_APP_UUID</string>
        </dict>
        </plist>
        ```
      </Step>

      <Step title="Configuring AppDelegate.swift">
        Next, you'll need to head over to your `AppDelegate.swift` file to add an import of `ParticleConnect`.

        ```dart theme={null}
        import ParticleConnect
        ```

        Within your application's `application` method (as shown below), you'll need to include a handler condition derived from `ParticleConnect.handleUrl`. This should be as simple as a `true` return upon a truthy value of `ParticleConnect.handleUrl`, and a `super.application(app, open: url, options: options)` return upon a falsy value.

        ```dart theme={null}
        override func application(_ app: UIApplication, open url: URL, options: [UIApplication.OpenURLOptionsKey: Any] = [:]) -> Bool {
          if ParticleConnect.handleUrl(url) {
              return true
          } else {
              return super.application(app, open: url, options: options)
          }
        }
        ```
      </Step>

      <Step title="Setting your scheme URL">
        Additionally, you'll need to configure your application's scheme URL. To configure this, select your application from "TARGETS" under the "Info" section, then click "+" to add a URL type.

        For example, if your `appId` is `63bfa427-cf5f-4742-9ff1-e8f5a1b9828f`, then the scheme URL would be `pn63bfa427-cf5f-4742-9ff1-e8f5a1b9828f` --simply adding `pn` to the beginning of the `appId`.
      </Step>

      <Step title="Configuring Info.plist">
        Now, head over to your `Info.plist` file and include the following snippet:

        ```xml Info.plist theme={null}
        <key>LSApplicationQueriesSchemes</key>
        <array>
        <string>metamask</string>
        <string>phantom</string>
        <string>bitkeep</string>
        <string>imtokenv2</string>
        <string>rainbow</string>
        <string>trust</string>
        <string>zerion</string>
        <string>mathwallet</string>
        <string>oneinch</string>
        <string>awallet</string>
        <string>okex</string>
        <string>bnc</string>
        </array>
        <key>NSPhotoLibraryUsageDescription</key>
        <string>We need access in order to open photos of barcodes</string>
        <key>NSCameraUsageDescription</key>
        <string>We use the camera to scan barcodes</string>
        <key>NSFaceIDUsageDescription</key>
        <string>We use Face ID for secure access to the app.</string>
        ```
      </Step>

      <Step title="Configuring your Podfile">
        Finally, you'll need to edit your Podfile to ensure `particle_connect` is properly imported. Head over to the [linked guide](https://github.com/Particle-Network/particle-flutter/blob/master/particle-connect/example/ios/Podfile) to complete this if you haven't already.
      </Step>
    </Steps>

    <Note>
      <p>Another important note before continuing.</p>
      <p>Our SDK is a static library (XCFramework). When using the Particle Auth Flutter SDK, you'll need to specify that you're using a static framework through the following:</p>

      <p>
        ```ruby theme={null}
        post_install do |installer|
          installer.pods_project.targets.each do |target|
            target.build_configurations.each do |config|
              config.build_settings['BUILD_LIBRARY_FOR_DISTRIBUTION'] = 'YES'
            end
          end
        end
        ```
      </p>
    </Note>

    ***
  </Step>

  <Step title="Initializing Particle Connect">
    Having now installed and configured Particle Connect, the only step remaining before the SDK can be used is initialization.

    Particle Connect can be initialized by simply calling the `init` method on `ParticleConnect`. This takes the following parameters:

    * `chainInfo`, representing the primary chain you intend to use (for example, `ChainInfo.Ethereum`, `chainInfo.Polygon`).
    * `dappMetaData`, derived from `DappMetaData`
    * `env`, affecting the information logged within your environment (`Env.dev`, `Env.production`, or `Env.staging`).

    The snippet below is an example of this.

    ```dart theme={null}
    final dappInfo = DappMetaData(
        "Particle Connect",
        "https://connect.particle.network/icons/512.png",
        "https://connect.particle.network",
        "Particle Connect Flutter Demo");
    // Initialize ParticleConnect and ParticleAuthCore.
    ParticleConnect.init(currChainInfo, dappInfo, Env.dev);
    ParticleAuthCore.init();
    ```
  </Step>

  <Step title="Facilitating connection">
    Now that Particle Connect has been installed, configured, and initialized, you're ready to facilitate connection through the Particle Connect modal.

    To do this, you'll need to establish a `connectKitConfig` instance specifying the:

    * Onboarding mechanisms you'd like to support, through `connectOptions` (such as `.EMAIL`, `.PHONE`, `SOCIAL`, `WALLET`).
    * Social login providers you'd like to support, through `socialProviders` (such as `.GOOGLE`, `.APPLE`).
    * Wallets you'd like to be included as options within the modal, through `walletProviders` (specified through an instance of `EnableWalletProvider`, as shown below).
    * (Optionally), layout options altering the format of the connection modal through `additionalLayoutOptions`.
    * (Optionally), additional customizations, such as a custom icon, through `logo`.

    Upon generating this config (with `ConnectKitConfig`), you'll be able to call `ParticleConnect.connectWithConnectKitConfig`, initiating the resulting connection modal.

    ```dart theme={null}
    final config = ConnectKitConfig(
      logo: "", // base64 or image URL
      connectOptions: [
        ConnectOption.EMAIL,
        ConnectOption.PHONE,
        ConnectOption.SOCIAL,
        ConnectOption.WALLET,
      ], // Changing the order will alter the UI
      socialProviders: [
        EnableSocialProvider.GOOGLE,
        EnableSocialProvider.TWITCH,
        EnableSocialProvider.APPLE,
        EnableSocialProvider.DISCORD,
        EnableSocialProvider.TWITTER,
        EnableSocialProvider.FACEBOOK,
        EnableSocialProvider.GITHUB,
        EnableSocialProvider.MICROSOFT,
        EnableSocialProvider.LINKEDIN,
      ], // Changing the order will alter the UI
      walletProviders: [
        EnableWalletProvider(EnableWallet.MetaMask,
            label: EnableWalletLabel.RECOMMENDED),
        EnableWalletProvider(EnableWallet.OKX),
        EnableWalletProvider(EnableWallet.Trust,
            label: EnableWalletLabel.POPULAR),
        EnableWalletProvider(EnableWallet.Bitget),
        EnableWalletProvider(EnableWallet.WalletConnect),
      ], // Changing the order will alter the UI
      additionalLayoutOptions: AdditionalLayoutOptions(
        isCollapseWalletList: false,
        isSplitEmailAndSocial: true,
        isSplitEmailAndPhone: false,
        isHideContinueButton: false,
      ),
    );

    final account = await ParticleConnect.connectWithConnectKitConfig(config);
    ```
  </Step>
</Steps>

## Examples of Utilization

### Retrieving User Information

Upon wallet connection (or social login), you'll be able to retrieve information about the resulting account.

Basic account information can be found through the result of `ParticleConnect.connectWithConnectKitConfig`, in this case, that was saved to `account`, which contains properties such as `publicAddress` and `walletType`.

To explicitly retrieve `userInfo` (a collection of information regarding the login mechanism, attached addresses, and so on; more information can be found within its [API reference](/social-logins/api/server/getuserinfo)), you'll need to call `ParticleAuthCore.getUserInfo`.

An example of both approaches can be found below.

```dart theme={null}
const publicAddress = account.publicAddress
const walletType = account.walletType

if (walletType.toLowerCase() == "authCore") {
  final userInfo = await ParticleAuthCore.getUserInfo();
}
```

### Send a Transaction

To do this, you'll need to construct a transaction with `EvmService.createTransaction` using standard parameters such as `evmAddress` (from, or the sender), `data`, `value`, and `receiverAddres` (to, or the recipient),

To execute the resulting transaction, you'll need to initialize an instance of the active connected wallet; an example of doing this has been included in the snippet below.

Finally, using this instance, the transaction can be executed through `ParticleConnect.signAndSendTransaction`, taking the sender's address alongside the previously constructed transaction object.

```dart theme={null}
final evmAddress = account.publicAddress;
const receiverAddress = "0x0000000000000000000000000000000000000000";
final value = BigInt.from(0.000000001 * pow(10, 18));
const data = "0x";

final transaction = await EvmService.createTransaction(evmAddress, data, value, receiverAddress);
String txHash = await ParticleConnect.signAndSendTransaction(WalletType.authCore, account.publicAddress, transaction);
```

### Open Wallet

If you included `particle_wallet` within your `pubspec.yaml`, you can open the (optional) **embedded wallet interface** at any time after a user connects, use `ParticleWallet.setSupportChain` to set supported chains, then `ParticleWallet.navigatorWallet` to open the interface.

```dart theme={null}
List<ChainInfo> chainInfos = [
  ChainInfo.Ethereum,
  ChainInfo.Polygon,
  ChainInfo.BNBChain
];
ParticleWallet.setSupportChain(chainInfos);
ParticleWallet.navigatorWallet();
```

<Tip> To implement account abstraction within your Flutter project, integrate the `particle_aa` SDK and refer to this [documentation](/aa/sdks/mobile/flutter). Additionally, a demo repository can be found [here](https://github.com/Particle-Network/particle-flutter/tree/master/particle-aa/example). </Tip>
