> ## Documentation Index
> Fetch the complete documentation index at: https://developers.particle.network/llms.txt
> Use this file to discover all available pages before exploring further.
# Android Quickstart
# Quickstart: Implementing Particle Connect within Android Applications
Particle Network has support for Android (Kotlin) through various platform-native SDKs. Getting started only takes a few steps.
This document covers everything needed to get up and running with Particle Connect on Android in just a few minutes.
For complete documentation covering the implementation of Particle Connect on Android in more depth, head over to the [Android SDK reference](/social-logins/connect/mobile/android).
***
Before getting started, there are a few prerequisites to keep in mind; the instructions following may not work correctly if your project doesn't meet these requirements.
### Prerequisites
* minSdkVersion **23** or higher.
* compileSdkVersion, targetSdkVersion **34** or higher.
* JavaVersion **17**.
* [Jetpack (AndroidX)](https://developer.android.com/jetpack/androidx/migrate?authuser=0).
* Android Gradle Plugin Version **8.5.1** or higher.
* Gradle Version **8.9** or higher.
To begin, you'll need to ensure your `settings.gradle` file is structured/configured to use Maven; below is an example of how this file should look.
```gradle theme={null}
// From https://github.com/Particle-Network/particle-android/blob/master/settings.gradle.kts
pluginManagement {
repositories {
gradlePluginPortal()
google()
mavenCentral()
}
}
dependencyResolutionManagement {
repositoriesMode.set(RepositoriesMode.FAIL_ON_PROJECT_REPOS)
repositories {
google()
mavenCentral()
maven { setUrl("https://jitpack.io") }
}
}
```
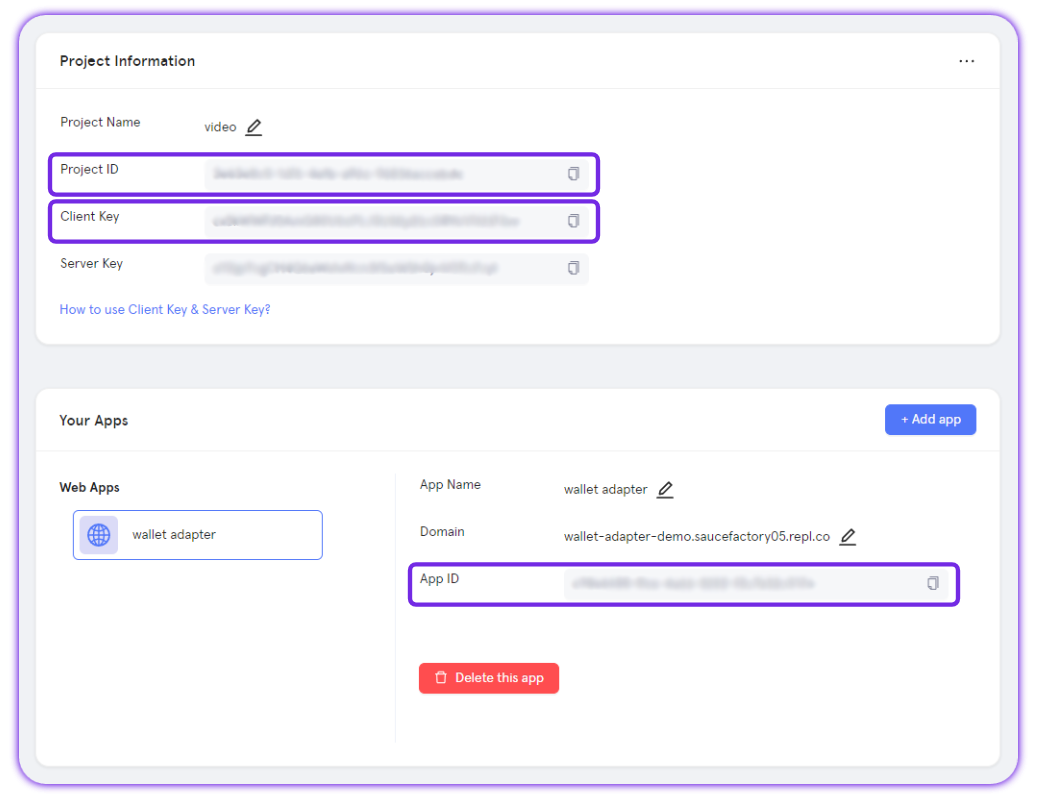
Before continuing to the configuration of `build.gradle`, we'll need to first retrieve three key values from the [Particle dashboard](https://dashboard.particle.network).
These values include your: `projectId`, `clientKey`, and `appId`. Using these keys, you'll be able to link your instance of Particle Connect with a project configured on the dashboard.
To retrieve these, follow the below steps.
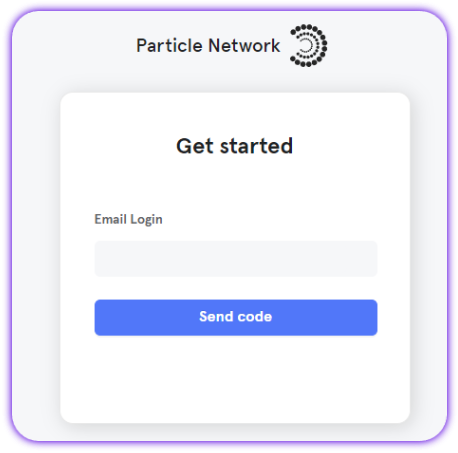
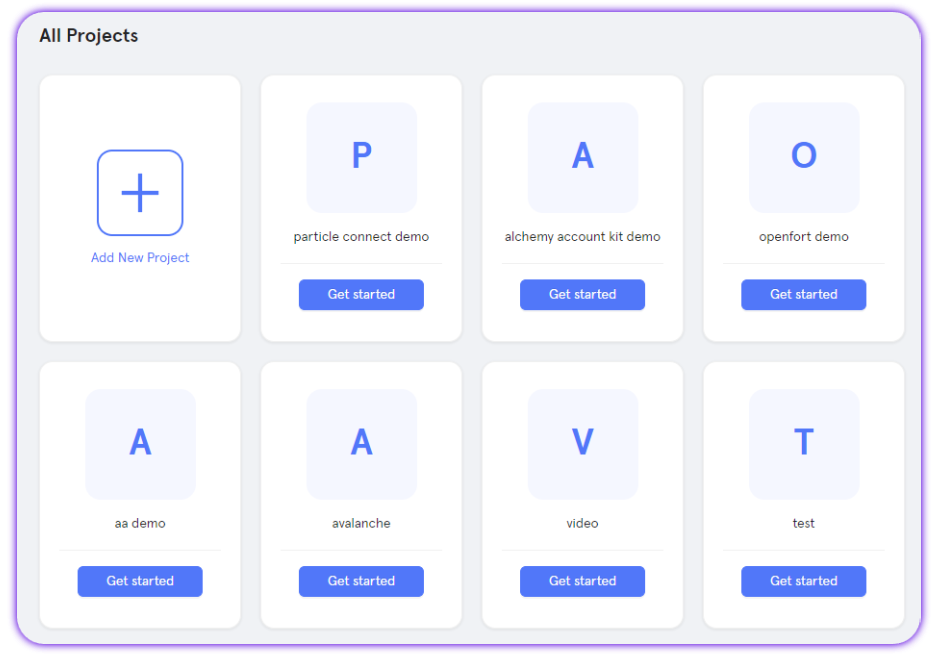
Sign up or Log in into the [Particle dashboard](https://dashboard.particle.network/)
For more information on the Particle dashboard, take a look at [this video](https://www.youtube.com/watch?v=d7DYCMNDmjo\&ab_channel=ParticleNetwork) or visit the [dashboard quickstart](/social-logins/dashboard).
With your project keys retrieved, you're ready to configure Particle through your `build.gradle` file. Here, you'll establish the various SDKs used within your application and plug in the aforementioned keys.
Specifically, you'll need the following libraries:
* `network.particle:connect`
* `network.particle:connect-kit`
* `network.particle:connect-auth-core-adapter`
* `network.particle:api-service`
* `network.particle:connect-evm-adapter`, for onboarding via EVM private key. (not recommended)
* `network.particle:connect-solana-adapter`, for onboarding via Solana private key. (not recommended)
* `network.particle:connect-phantom-adapter`, if using Phantom.
* `network.particle:connect-wallet-connect-adapter`,
* `network.particle:wallet-service`, if you'd like to use Particle's embedded wallet interface.
* `network.particle:aa-service`, if you'd like to use ERC-4337 account abstraction.
All in all, your `build.gradle` file should look similar to the following (replace the placeholder values with the previously retrieved keys and proper SDK versions).
```gradle theme={null}
// From https://github.com/Particle-Network/particle-android/blob/master/app/build.gradle.kts
android {
//...
defaultConfig {
//...
minSdk = 23
targetSdk = 34
manifestPlaceholders["PN_PROJECT_ID"] = "Replace this with your Project ID"
manifestPlaceholders["PN_PROJECT_CLIENT_KEY"] = "Replace this with your Client Key"
manifestPlaceholders["PN_APP_ID"] = "Replace this with your App ID"
//...
}
compileOptions {
sourceCompatibility(JavaVersion.VERSION_17)
targetCompatibility(JavaVersion.VERSION_17)
}
kotlinOptions {
jvmTarget = JavaVersion.VERSION_17.toString()
}
dataBinding {
isEnabled = true
}
}
dependencies {
//required
modules {
module("org.bouncycastle:bcprov-jdk15to18") {
replacedBy("org.bouncycastle:bcprov-jdk15on")
}
module("org.bouncycastle:bcprov-jdk18on") {
replacedBy("org.bouncycastle:bcprov-jdk15on")
}
}
// Find the latest version of the SDK:
// https://search.maven.org/search?q=g:network.particle
val sdkVersion = "x.x.x" // Replace this
implementation("network.particle:connect:$sdkVersion")
implementation("network.particle:connect-kit:$sdkVersion")
implementation("network.particle:connect-evm-adapter:$sdkVersion")
implementation("network.particle:connect-solana-adapter:$sdkVersion")
implementation("network.particle:connect-phantom-adapter:$sdkVersion")
implementation("network.particle:connect-wallet-connect-adapter:$sdkVersion")
implementation("network.particle:connect-auth-core-adapter:$sdkVersion")
implementation("network.particle:api-service:$sdkVersion")
implementation("network.particle:wallet-service:$sdkVersion")
implementation("network.particle:aa-service:$sdkVersion")
}
```
With your `build.gradle` file ready to go, the final point of configuration needed is within `AndroidManifest.xml`, in which you'll have to insert the previously retrieved project keys once again.
Below is an example of this file with areas in which project keys are needed highlighted.
```xml theme={null}
```
Finally, with your project configured (`settings.gradle`, `build.gradle`, and `AndroidManifest.xml`), it's time to initialize Particle Connect within your application.
This is done through `ParticleConnect.init`, which takes the following parameters:
* `application`, which represents the underlying Android application.
* `env`, either `env.PRODUCTION`, `env.DEV`, or `env.STAGING`; this alters the information logged when running the application.
* `chain`, a `ChainInfo` object (from `network.particle.chains.ChainInfo.Companion.{chain}`) that represents the primary chain you intend to use.
* `dAppData`, metadata for your application to be used with WalletConnect.
* `createAdapters`, a list of wallets (adapters imported from `com.wallet.connect.adapter.{Adapter}`) that you'd like to support within your application.
An example of a complete call to `ParticleConnect.init` has been included below.
```kotlin theme={null}
// From https://github.com/Particle-Network/particle-android/blob/master/app/src/main/java/network/particle/demo/utils/ParticleInitUtils.kt
val dAppMetadata = DAppMetadata(
"Particle Connect",
"https://connect.particle.network/icons/512.png",
"https://particle.network",
description = "Particle Connect is a decentralized wallet connection protocol that makes it easy for users to connect their wallets to your DApp.",
)
ParticleConnect.init(
app, Env.PRODUCTION, chainInfo, dAppMetadata
) {
listOf(
AuthCoreAdapter(),
MetaMaskConnectAdapter(),
RainbowConnectAdapter(),
TrustConnectAdapter(),
PhantomConnectAdapter(),
WalletConnectAdapter(),
ImTokenConnectAdapter(),
BitGetConnectAdapter(),
EVMConnectAdapter(),
SolanaConnectAdapter(),
)
}
ParticleWallet.init(app) // If using Particle Wallet
```
The connection modal provided by Particle Connect (including both wallets defined through the aforementioned list of adapters alongside social logins) can be opened now that the SDK has been initialized.
Opening the modal is as simple as defining the various social logins you'd like to be supported alongside the wallets being used and their order; this is handled through `ParticleConnectKit.connect`, passing an instance of `ConnectKitConfig`, as exemplified below.
```kotlin theme={null}
// From https://github.com/Particle-Network/particle-android/blob/master/app/src/main/java/network/particle/demo/ui/ParticleWalletLoginDemoActivity.kt
val config = ConnectKitConfig(
logo = "",
connectOptions = listOf(
ConnectOption.EMAIL,
ConnectOption.PHONE,
ConnectOption.SOCIAL,
ConnectOption.WALLET),
socialProviders = listOf(
EnableSocialProvider.GOOGLE,
EnableSocialProvider.APPLE,
EnableSocialProvider.DISCORD,
EnableSocialProvider.TWITTER,
EnableSocialProvider.FACEBOOK,
EnableSocialProvider.GITHUB,
EnableSocialProvider.MICROSOFT,
EnableSocialProvider.TWITCH,
EnableSocialProvider.LINKEDIN),
walletProviders = listOf(
EnableWalletProvider(EnableWallet.MetaMask, EnableWalletLabel.RECOMMENDED),
EnableWalletProvider(EnableWallet.OKX),
EnableWalletProvider(EnableWallet.Phantom),
EnableWalletProvider(EnableWallet.Trust),
EnableWalletProvider(EnableWallet.Bitget),
EnableWalletProvider(EnableWallet.WalletConnect),
),
additionalLayoutOptions = AdditionalLayoutOptions(
isCollapseWalletList = false,
isSplitEmailAndSocial = false,
isSplitEmailAndPhone = false,
isHideContinueButton = false
)
)
ParticleConnectKit.connect(config,connectCallback = object : ConnectKitCallback {
override fun onConnected(walletName: String, account: Account) {
LogUtils.d("onConnected: $walletName, $account")
lifecycleScope.launch {
ParticleWallet.setWallet(account.publicAddress,walletName)
PNRouter.build(RouterPath.Wallet).navigation()
openWallet() // To open the embedded wallet interface upon connection
}
}
override fun onError(error: ConnectError) {
}
});
```
## Examples of Utilization
### Retrieve User Information
Upon a successful connection, you'll be able to retrieve information about the resulting account through two mechanisms. The first involves reading properties on the object originally assigned to the `ParticleConnectKit.connect` call, which will contain core properties such as `publicAddress` after an account is loaded.
Additionally, to explicitly retrieve detailed information, you can call `AuthCore.getUserInfo`, which will return a `userInfo` object with various properties detailing the connection method used, addresses, and so on (to learn more about the structure of this object, head over to its [API reference](/social-logins/connect/mobile/android)).
Ensure you save basic account details, such as the address, because you'll need this later as a parameter within transaction execution functions.
```kotlin theme={null}
ParticleConnectKit.connect(config,connectCallback = object : ConnectKitCallback {
override fun onConnected(walletName: String, account: Account) {
// Save the account information properly; it will be needed when operating the account, such as for transfers and signing。
val publicAddress = account.publicAddress
val connectedWalletName = walletName
}
override fun onError(error: ConnectError) {
}
});
```
### Send a Transaction
Transactions can be constructed and sent directly through the SDK; below is an example of the standard flow here.
In essense, you'll need to generate a transaction object with `ParticleNetwork.evm.createTransaction` (or the `solana` equivalent), passing in standard parameters such as `from`, `to`, `value`, and (if you're interacting with a contract) `data`. Using these, an object will be returned which can be used directly for execution.
Execution needs to be initiated through an instance of the active connector, or adapter (the method in which a user connected); this can be retrieved and loaded using `ParticleConnect.getAdapters`, as demonstrated below. Upon loading the adapter, you can simply call `{adapter}.signAndSendTransaction`, passing in the previously generated transaction object. Upon doing so, the user will be prompted to confirm the transaction.
```kotlin theme={null}
val publicAddress = account.publicAddress
val connectedWalletName = walletName
val uiAmount = "0.0001"
val value = "0x"+uiAmount.toBigDecimal().multiply(BigDecimal(1e18)).toBigInteger().toString(16)
val trans = ParticleNetwork.evm.createTransaction(from ,to,value)!!.serialize()
val adapter = ParticleConnect.getAdapters().first { it.name == connectedWalletName }
adapter.signAndSendTransaction(publicAddress,trans,
object : TransactionCallback {
override fun onError(error: ConnectError) {
LogUtils.d("signAndSendTransaction onError")
}
override fun onTransaction(transactionId: String?) {
LogUtils.d("signAndSendTransaction onTransaction")
}
})
```
The complete demo project, which includes the code snippets covered above, can be found [here](https://github.com/Particle-Network/particle-android).